Networking

VMwareNSX

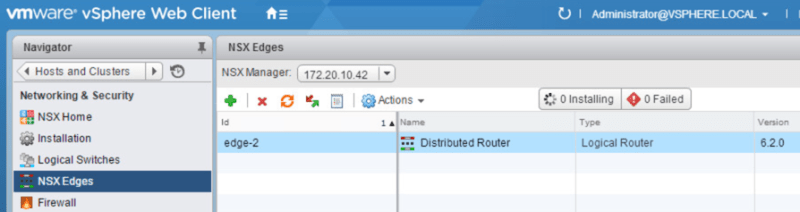
NSX Edge provides network address translation (NAT) service to assign a public address to a computer within a private network. The NSX edge supports using source NAT (SNAT) and destination NAT (DNAT). SNAT is used for translating a internal IP address to a public external address. Since external IP addresses have no knowledge of internal IP addresses, NAT is needed for communication. DNAT allows access from outside/external networks to internal private networks. NAT is important for providing access to services within your private network and for providing the ability to access services that are external to your network. For ex: In order for a machine on your private network to be able to access the internet, NAT is need. In this blog post, I’ll show you how to configure source NAT (SNAT) on a NSX edge device to do just that.

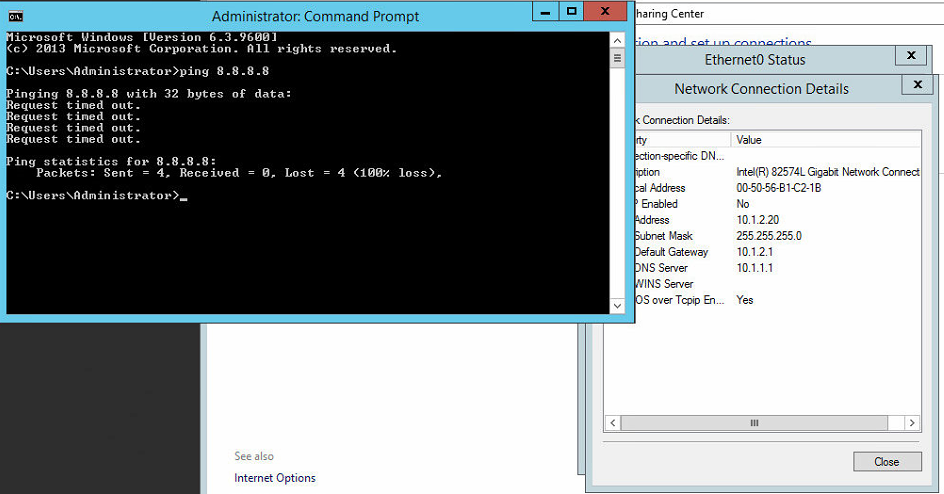
In our example, we will have a VM (VM01) with a IP address of 10.1.2.20 that is attached to a NSX logical switch (Tenant A). In order for this VM to access the internet, we will translate it’s IP to an IP that is internet accessible. Right now, as you can see, we cannot access the outside world. We test this by pinging Google’s public DNS (8.8.8.8).

nat

Let’s get started with changing this and making the VM accessible to the internet. Read Full Article

VMwareNSX

One of the services that the NSX Edge (ESG) provides is IP address pooling and one-to-one static IP address allocation and external DNS services. NSX Edge listens to the internal interface for DHCP requests and uses the internal interface IP as the default gateway for clients. In this post, I’ll show you how to configure DCHP on the NSX Edge to provide IP addresses to clients on a logical switch.

First, navigate to Networking & Security > NSX Edges and select you ESG. Then navigate to Manage > DHCP > Pools. Under Pools, click the green “+”.

dhcp01 Read Full Article

VMwareNSX

In this blog post we will be deploying the NSX manager appliance. This is the first step in beginning to deploy NSX in your VMware environment. First things first, after downloading the NSX OVA file, right click on the cluster you want to deploy the appliance in and click Deploy OVF Template. Browse to and select the NSX OVA file and click Next.

man01

Read Full Article

VMwareNSX

The NSX service composer is one of my favorite features of NSX. I’ve never really considered myself to be lazy when it comes to doing something the right way…but I’ve never been one to overwork myself to do that. Dad always said “Work smarter, not harder”. The service composer is a combination of both. It’s a way to create multiple rules in your virtual infrastructure for items that are alike or that need to have the same type of services allowed or denied. For you Cisco guys, this is a familiar concept. Think objects and object groups on a ASA. For example, say I have a group of 6 web servers that I want to block ICMP traffic. Well that would normally mean that I would have to create 6 individual rules, one for each web server, to block this. With the service composer, however, I can create one rule. With the use of security groups and security policies, service composer makes life easy…and that doesn’t mean that you’re lazy 🙂

In this blog post, I will show you how to use the service composer to create a security policy and apply it to multiple servers.

First navigate to Networking & Security > Service Composer

sc2 Read Full Article

VMwareNSX

Picking up from where we left off, in our last post, we deployed the NSX Edge Appliance and created interfaces to connect to each of our logical switches to allow for communication between the VMs on each logical switch. In this post we will configure OSPF as our dynamic routing protocol between the edge appliance and the logical router.

Navigate to Networking & Security>NSX Edges. Double click the Edge Router. Under Manage>Routing>Global Configuration click Edit by Dynamic Routing Configuration.

dyr1 Read Full Article

VMwareNSX

In this post we will be deploying an additional Edge Services Gateway (ESG) so that we can take advantage of Equal-Cost Multipath (ECMP) from the distributed logical router to the ESG. The advantage of using ECMP is that you can split the traffic from VMs evenly between the ESGs and have multiple bidirectional links. Let’s get started configuring!

Navigate to Networking & Security > NSX Edges and click the green + to begin deploying a new ESG.

ecmp1

Read Full Article

VMwareNSX

Picking up from where we left off in our last post, we will be configuring routing between the physical network and the virtual network by means of the NSX Edge Services Gateway appliance.

A little backgroud about the NSX Edge:

NSX Edge provides network edge security and gateway services to isolate a virtualized network. The NSX Edge gateway connects isolated, stub networks to shared (uplink) networks by providing common gateway services such as DHCP, VPN, NAT, dynamic routing, and Load Balancing. Common deployments of NSX Edge include in the DMZ, VPN Extranets, and multi-tenant Cloud environments where the NSX Edge creates virtual boundaries for each tenant.

So to begin, we need to deploy a NSX edge appliance. We do this by navigating to Networking & Security > NSX Edges and clicking the green +

esg1

Read Full Article

In our last post, we deployed our logical switches and tested L2 connectivity between VMs on the same logical switch. As mentioned in that post, in order to allow communication between logical switches, we will need to deploy and configure a distributed logical router. That’s what we will be going over in this post.

First navigate to Networking & Security > NSX Edges and make sure the correct NSX manager is selected. Click the green +.

dlr

Read Full Article

Continuing from where we left off with deploying NSX controllers and preparing our hosts for NSX, now its time to deploy a logical switch and add virtual machines to it. A logical switch can be looked at as a logical broadcast domain to which virtual machines can be connected to. The segment IDs that are associated with them can be looked at as VLAN tags for logical switches. Each logical switch will have its own segment ID or VXLAN Network Identifier (VNI) assigned to it from the segment ID pool that was created under the Host Preparation tab.

To deploy a logical switch, navigate to Networking & Security > Logical Switches and click the green + symbol.

ls1

Read Full Article