
Picking up from where we left off in our last post, we will be configuring routing between the physical network and the virtual network by means of the NSX Edge Services Gateway appliance.
A little backgroud about the NSX Edge:
NSX Edge provides network edge security and gateway services to isolate a virtualized network. The NSX Edge gateway connects isolated, stub networks to shared (uplink) networks by providing common gateway services such as DHCP, VPN, NAT, dynamic routing, and Load Balancing. Common deployments of NSX Edge include in the DMZ, VPN Extranets, and multi-tenant Cloud environments where the NSX Edge creates virtual boundaries for each tenant.
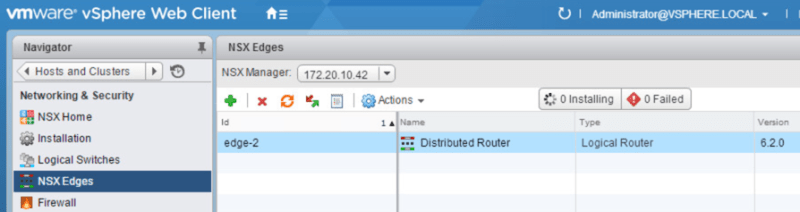
So to begin, we need to deploy a NSX edge appliance. We do this by navigating to Networking & Security > NSX Edges and clicking the green +
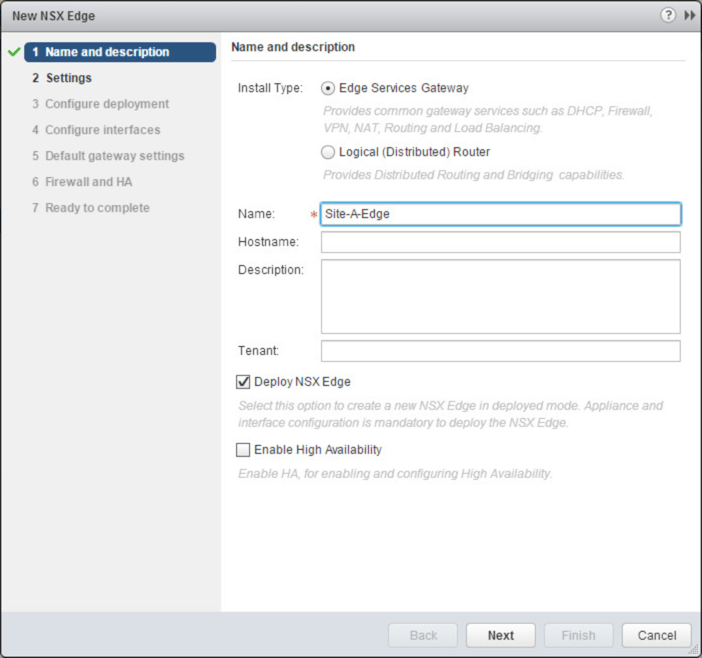
Leave Edge Services Gateway selected and give the appliance a name. Click Next
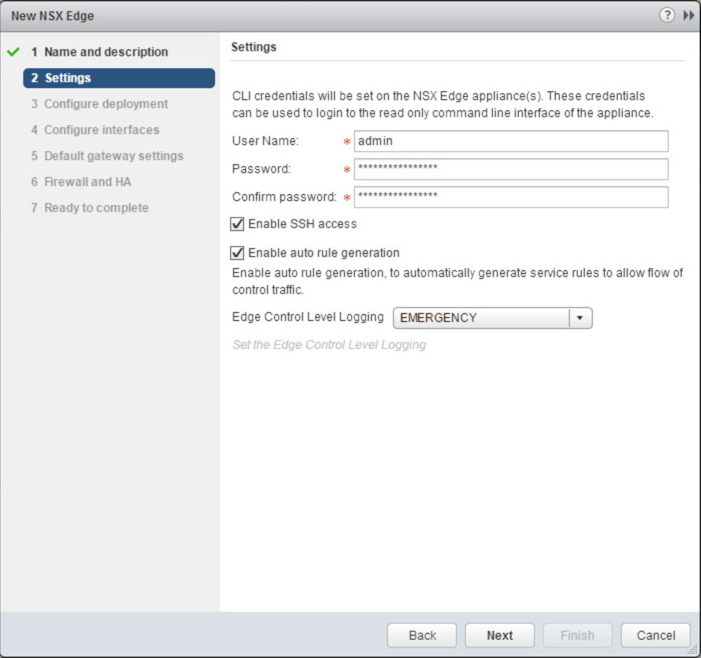
Create an admin password. Enable SSH access. Click Next
Click the green + to select what host and datastore you want to deploy the appliance to
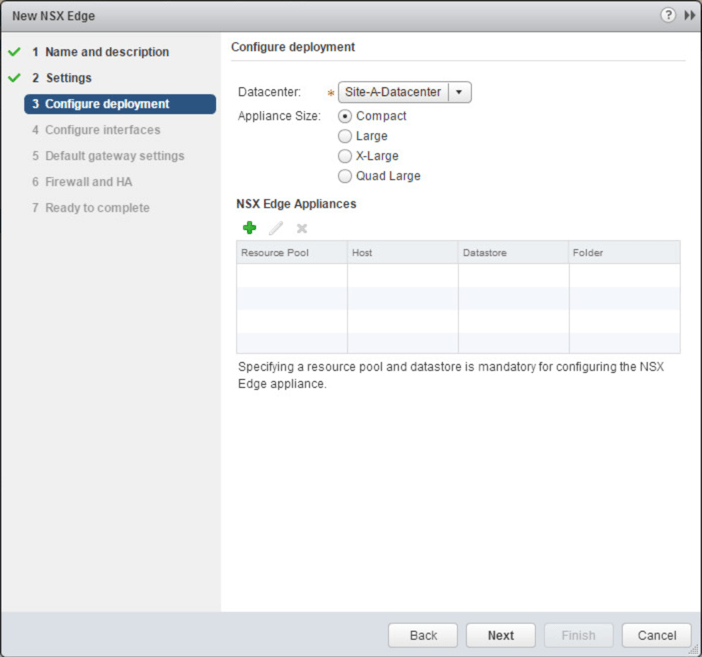
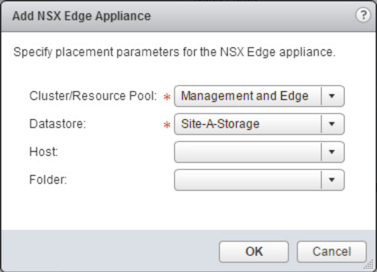
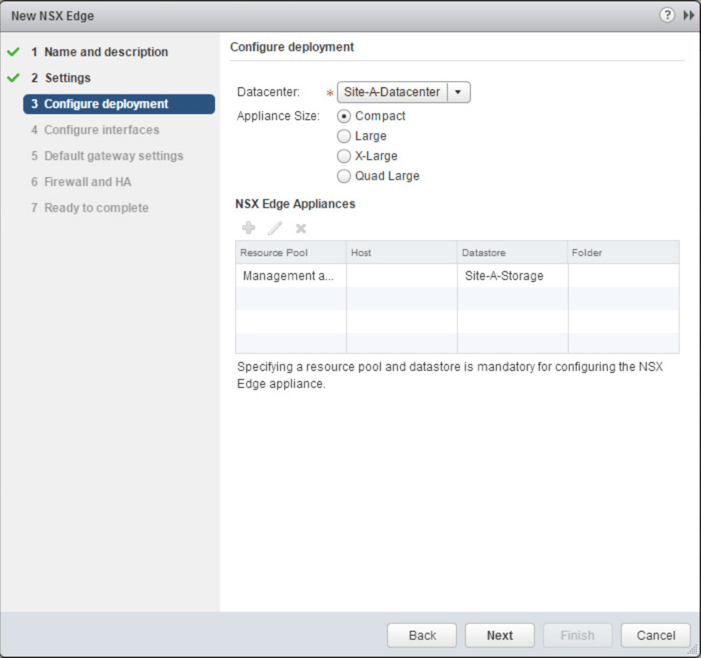
Select the cluster and datastore. Click OK
Click Next
Click the green + to add a interface to the NSX Edge
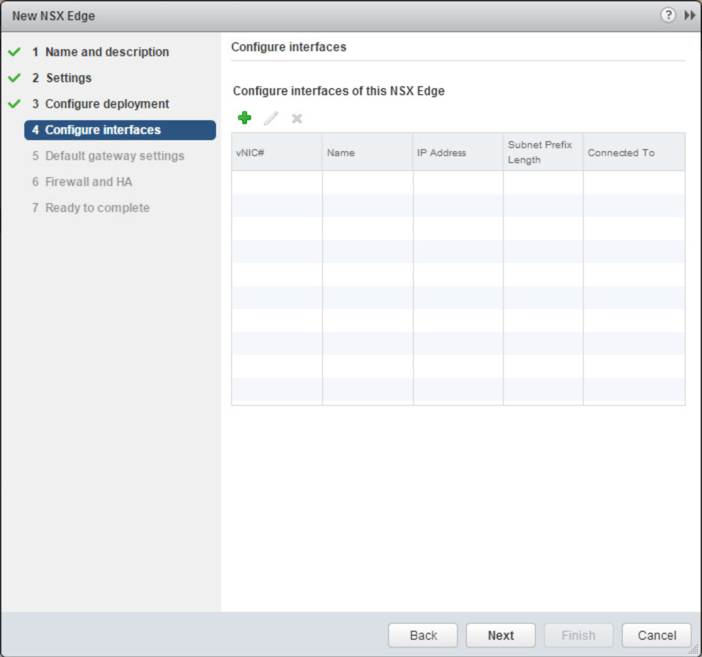
We are first going to create our uplink interface to connect us to the production network. Enter a name for the interface and primary IP address and subnet prefix. Next to the Connected To: field click Select.
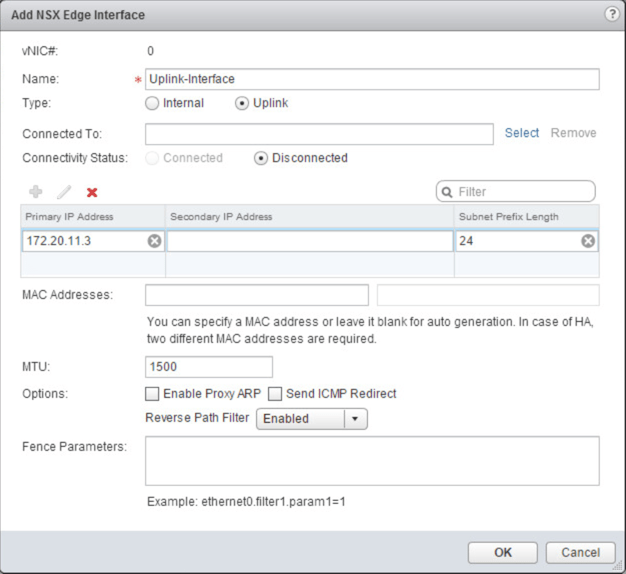
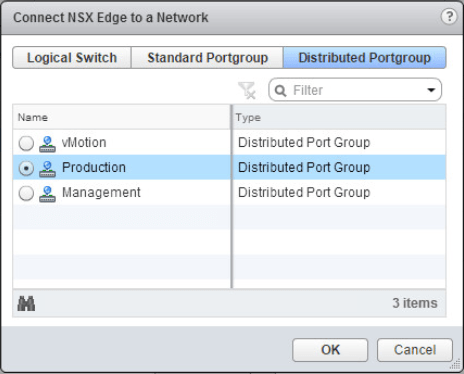
Select the Production distributed portgroup. Click OK
Now we want to add another interface to connect to our Transit logical switch. This will bridge the gap between the distributed logical router and the NSX edge. Enter a name for the interface and primary IP address and subnet prefix. Next to the Connected To: field click Select.
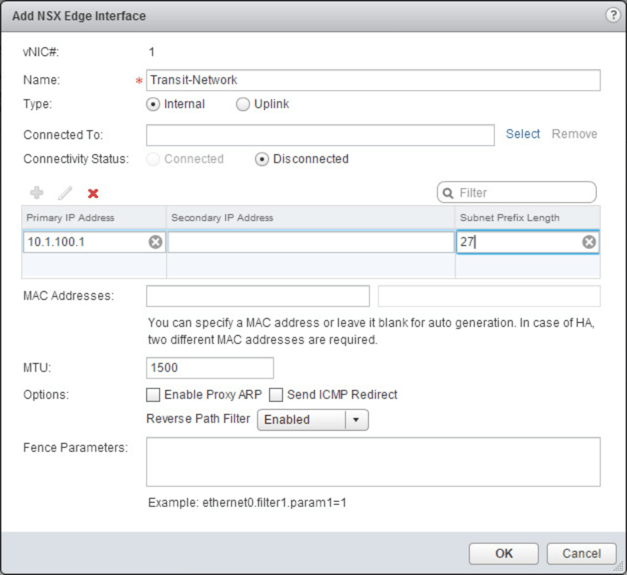
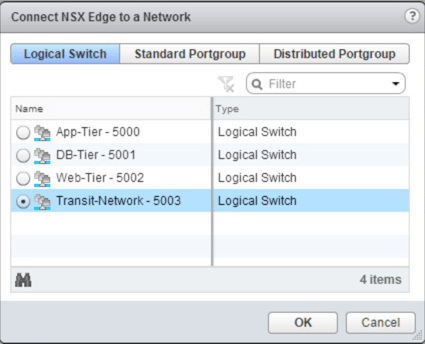
Select the Transit-Network logical switch. Click OK.
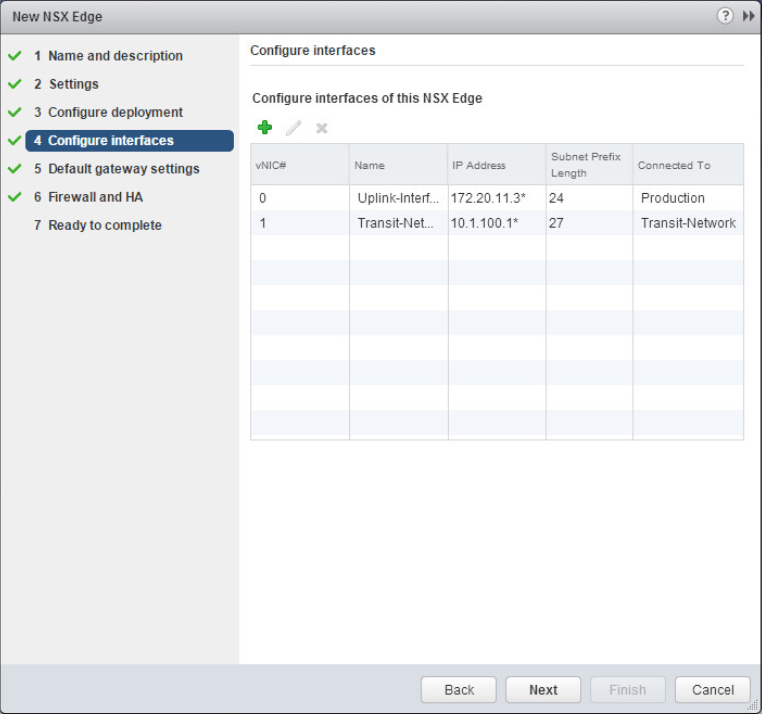
Check to make sure your interfaces have the proper IP address and that they are connected to the proper logical switch or portgroup. Click Next.
Configure the default gateway IP address. Click Next.

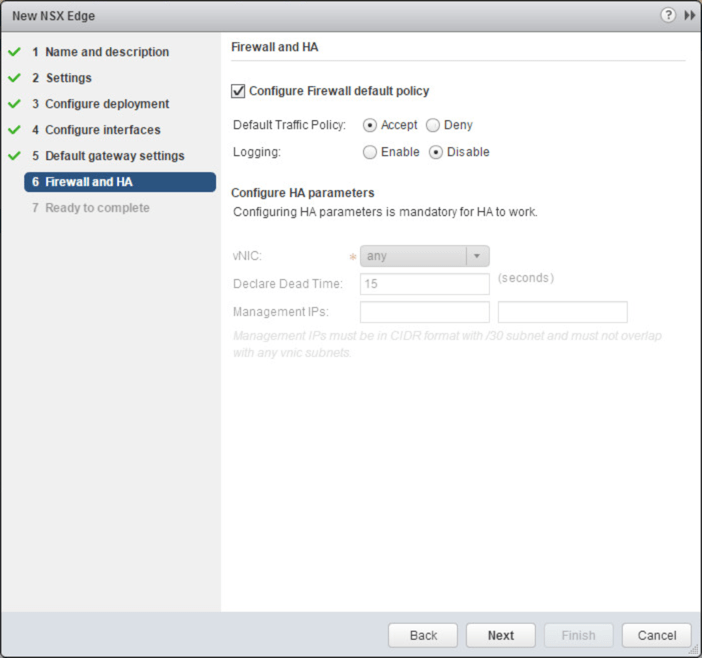
Select the box next to Configure Firewall default policy. Select Accept next to Default Traffic Policy. Click Next.
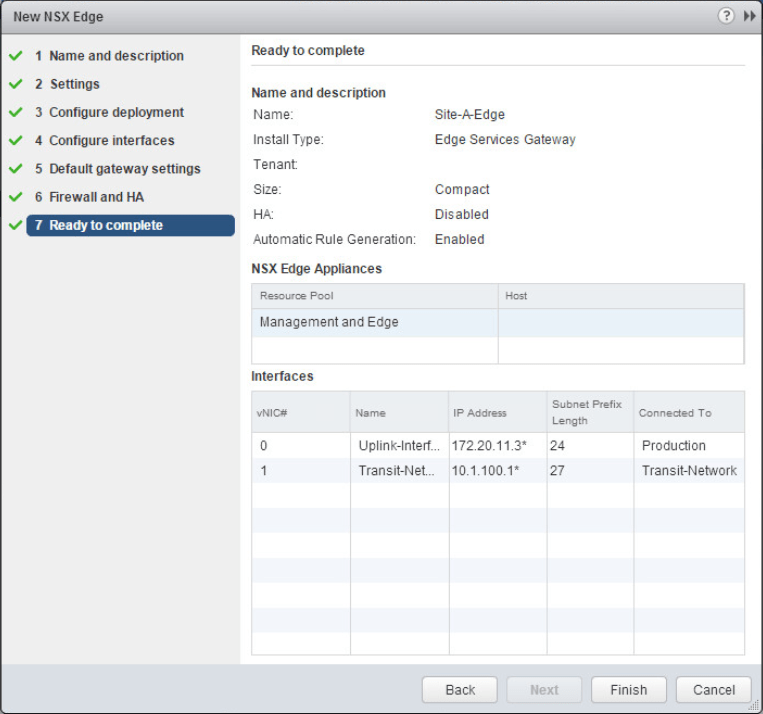
Verify the configuration and click Finish to begin deploying the NSX Edge.
Check that the NSX Edge has been successfully deployed. Double click the newly deployed NSX Edge.

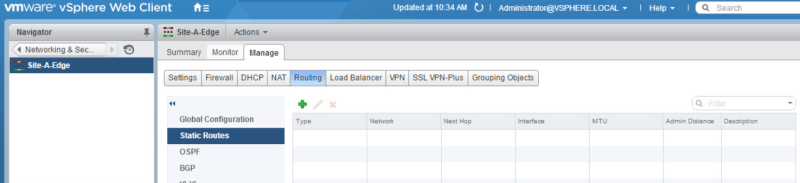
Navigate to Manage > Routing and select Static Routes. Click the green + add a static route. The route we are going to create is from the NSX Edge to the networks that sit behind the distributed logical router.
Enter in the network information and the next hop IP address. Select the proper interface. Click OK.
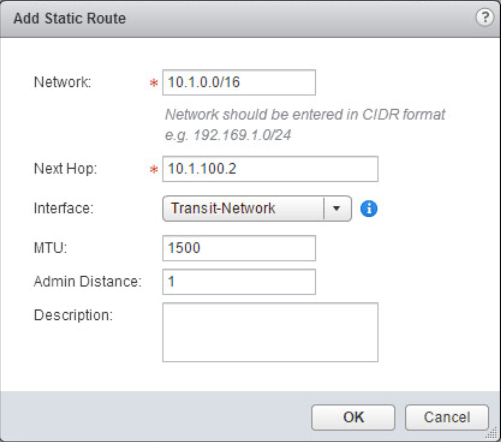
Publish the newly made changes.

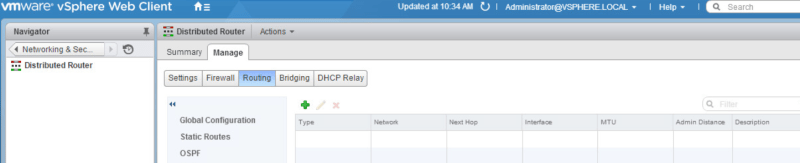
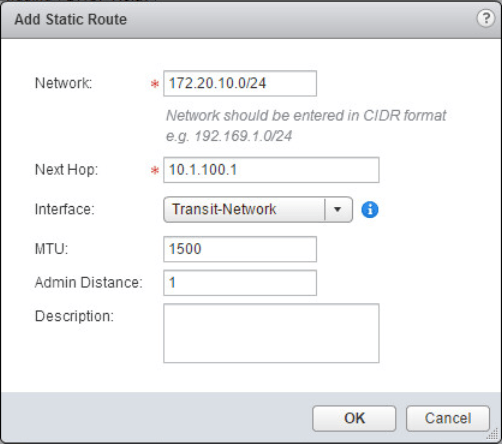
Now we need to create a static route from the distributed logical router to the outside production network that sits on the other side of the NSX Edge device. Back at our list of NSX Edges, double click the Distributed Router. Navigate to Manage > Routing and select Static Routes.
Enter in the network information and next hop. Select the correct interface. Click OK. Publish the new changes that were just made.
Now with the static routes configured, we should be able to access the virtual network from the outside physical network. From a desktop on the physical network I will ping one of the web servers on the Web-Tier logical switch. The ping is successful!

That’s it! We’ve configured routing between the VMs in the virtual environment and computers on the physical network by means of the NSX Edge appliance. The NSX Edge appliance is very versatile. It can do many functions as mentioned in the beginning of this post. In the next post we will configure dynamic routing using the OSPF routing protocol. Stay tuned!

2 thoughts on “Deploying an NSX Edge Services Gateway and Configuring Static Routing”