Picking up from where we left off, in our last post, we deployed the NSX Edge Appliance and created interfaces to connect to each of our logical switches to allow for communication between the VMs on each logical switch. In this post we will configure OSPF as our dynamic routing protocol between the edge appliance and the logical router.
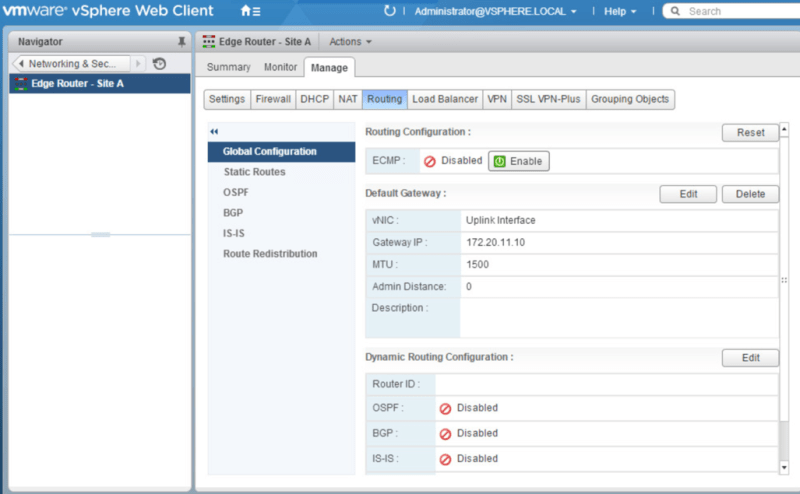
Navigate to Networking & Security>NSX Edges. Double click the Edge Router. Under Manage>Routing>Global Configuration click Edit by Dynamic Routing Configuration.
Select the Uplink interface for the Router ID
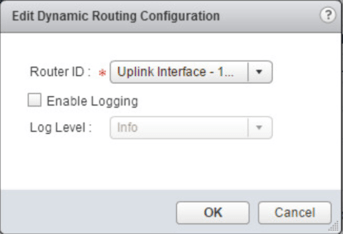
Publish the changes

Now we should see the IP of the Uplink interface as the Router ID

Navigate to Manage>Routing>OSPF and click Edit
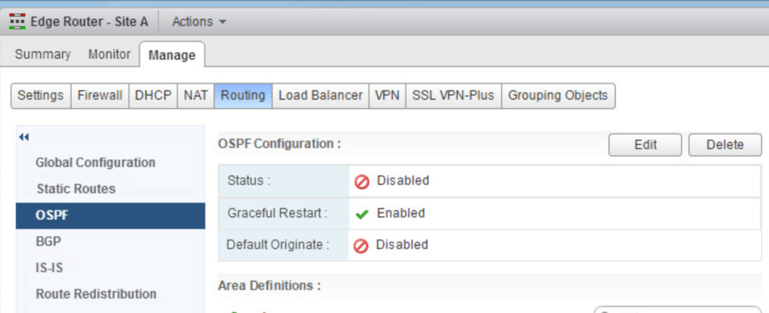
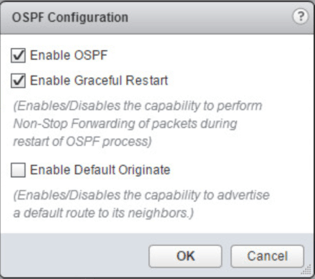
Select Enable OSPF. Click OK.
Click the green + next to Area Definitions
Enter in a number for the Area ID and leave all other settings the same. Click OK.

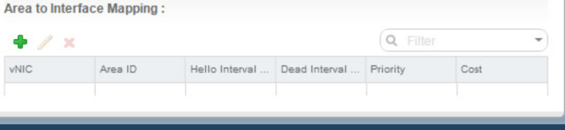
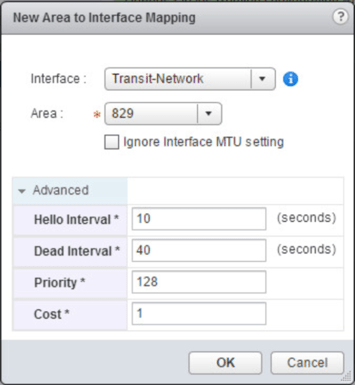
Under Area to Interface Mapping, click the green+
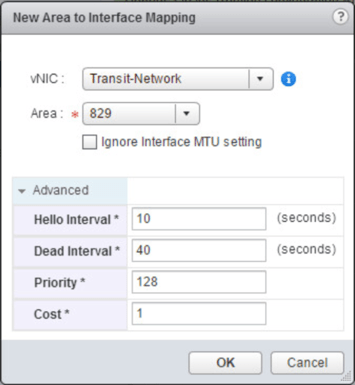
Here, we want to select our vNic that is connected to our Transit logical switch since we will be peering between this edge appliance and our distributed logical router. Select the newly created area ID. Click OK.
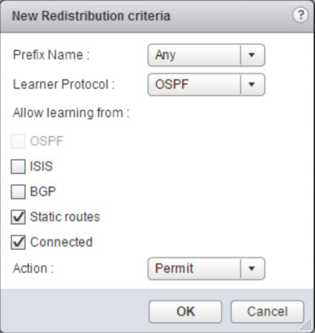
Navigate to Manage>Routing>Route Redistribution and click the green + under Route Redistribution table.
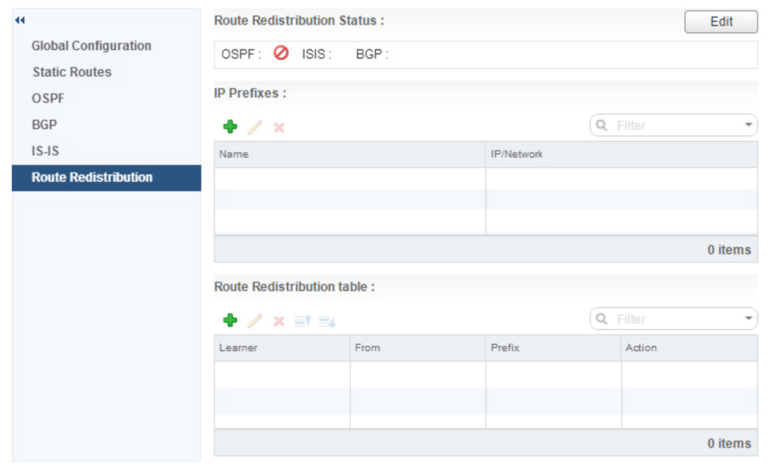
We want to redistribute all static and connected routes to OSPF. Select Static routes and Connected. Click OK.
Click Edit under Route Redistribution Status

Select OSPF. Click OK.

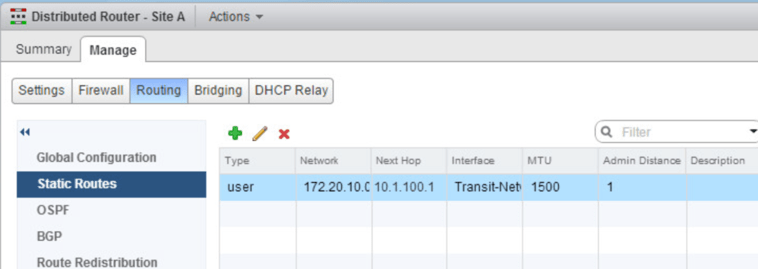
Now that we have finished with the OSPF configuration on the edge appliance, we need to setup OSPF on our distributed logical router. Under Networking & Security>NSX Edges double click on the distributed logical router. Navigate to Manage>Routing>Static Routes and verify that we still have a static route to the outside network.
Navigate to Manage>Routing>Global Configuration and click edit beside Dynamic Routing Configuration.
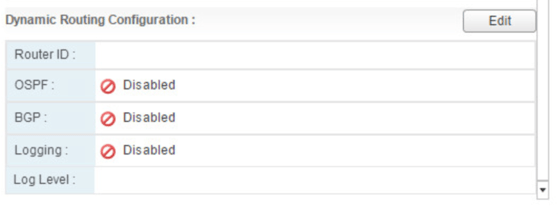
Select the Transit-Network for the Router ID. Click OK.
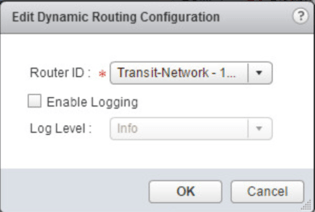
Notice now that we have the Router ID in place

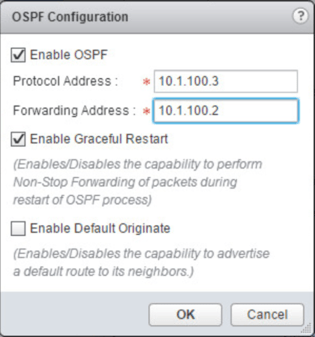
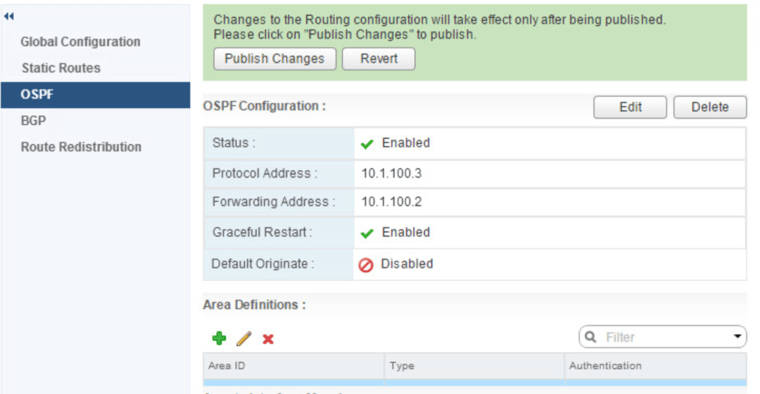
Navigate to Manage>Routing>OSPF and click Edit

Enable OSPF. Enter in a Protocol Address and a Forwarding Address. The Protocol address is an address in the same subnet as the Forwarding address that is used to make protocol adjacencies with the peers. The Forwarding address is used by the router to forward data packets.
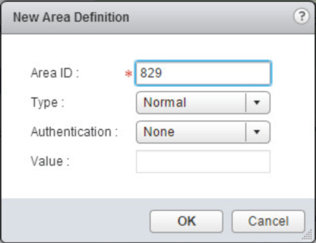
Click the green + under Area Definitions
Enter in the same Area ID that you configured on the Edge Appliance. Click OK.
 .
.
Click the green + under Area to Interface Mapping. Select the Transit-Network interface and select the area that was just created. Click OK and publish the changes.
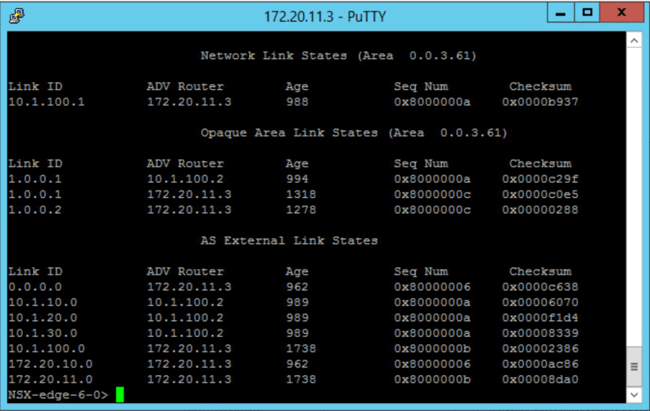
Everything is now setup. Just to verify the config, SSH into the Edge Appliance and enter show ip ospf database to see the adjacent router and the networks connected to them.