
In this blog post, I will go through the steps that it takes to create a host transport node within NSX-T. Before we get started with creating a host transport node, let’s explain what they are.
Transport Nodes
NSX-T requires transport nodes to perform networking (overlay or VLAN) and security functions. It is responsible for forwarding the data plane traffic originating from VMs, containers or apps running on bare metal servers. NSX-T supports the various types of transport nodes including: Hypervisor (ESXi or KVM), Bare Metal (RHEL, CentOS, Ubuntu), and NSX Edge. Since NSX-T is decoupled from the hypervisor, ESXi and KVM transport nodes can work together and networks and topologies can extend to both ESXi and KVM environments.
Transport Node Components
Each transport node has a management plane agent (MPA), local control plane (LCP), and N-VDS installed. The NSX Manager polls for configuration, statistics and status from the transport node using the MPA. The LCP computes the local runtime state for the endpoint based on updates from the central control plane (CCP) and local data plane information. It also pushes stateless configurations to forwarding engines in the data plane and reports the information back to the central control plane. The N-VDS, also known as the host switch, is the primary component in the data plane. It does the switching, overlay encapsulation and decapsulation, firewall creation, and routing. The N-VDS is what is used to attach VMs to NSX-T logical switches and for creating logical router uplinks and downlinks. The N-VDS gets installed on a transport node once the node has been added to a transport zone, as each transport zone has it’s own N-VDS.
Configuring a ESXi Host Transport Node
To being configuring a ESXi host transport node, log in to the NSX Manager with admin credentials. Navigate to System > Fabric > Nodes > Host Transport Nodes. Click the drop down beside “Managed By” and select your vCenter.
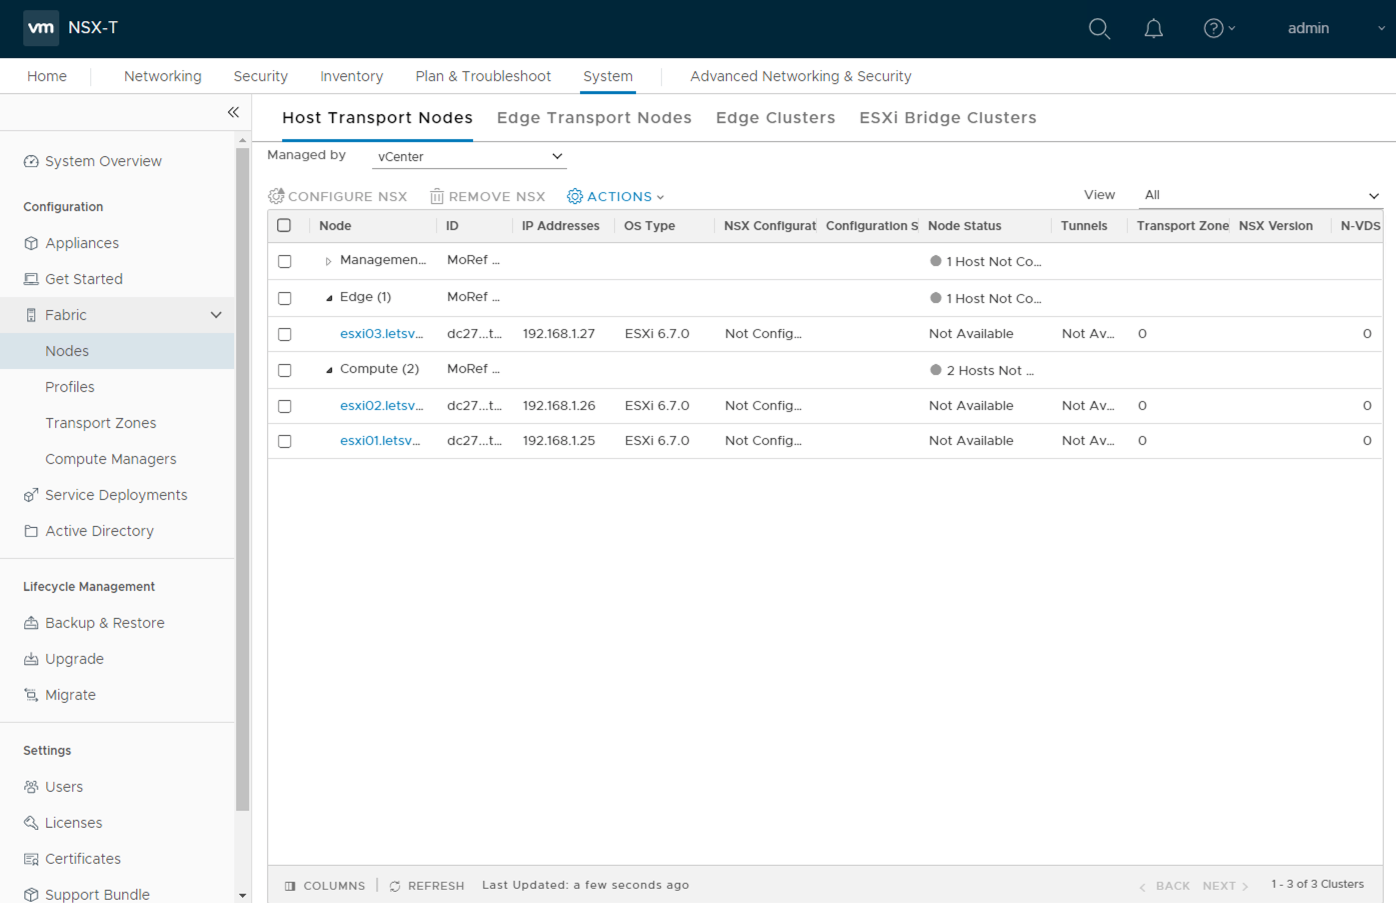
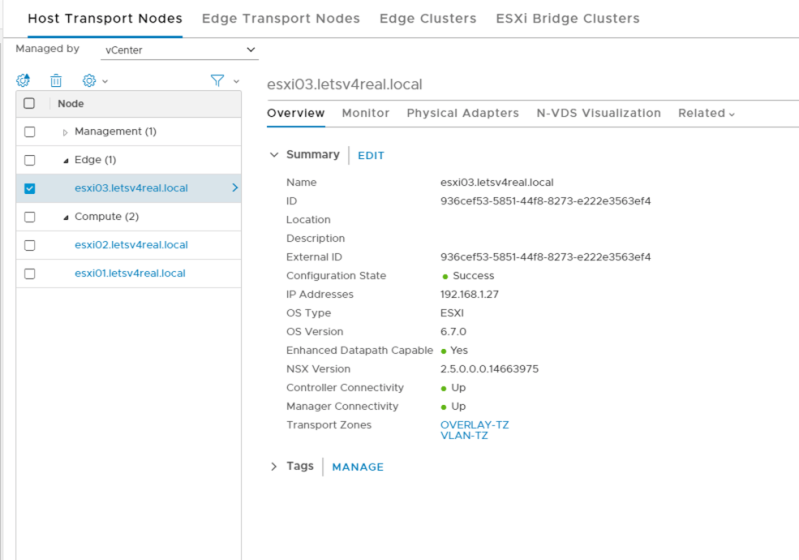
Select the node that you want to configure by clicking the checkbox beside the host. Click Configure NSX. The Configure NSX details will appear.
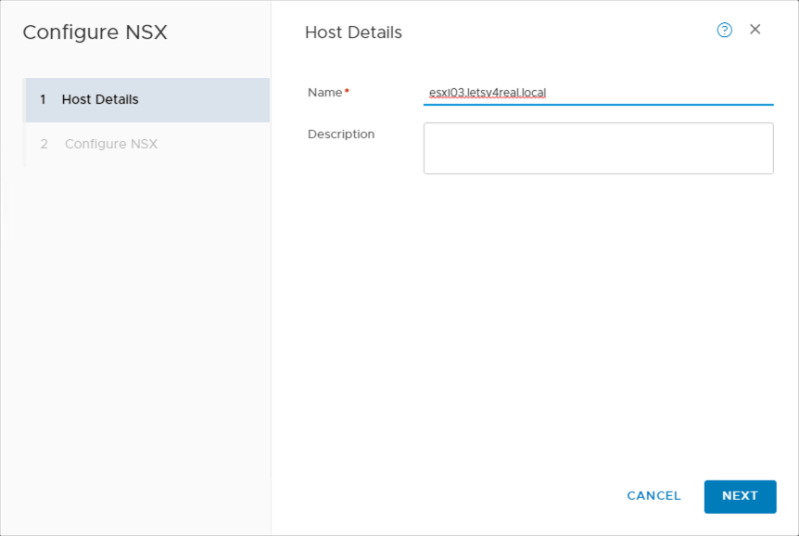
Click Next.
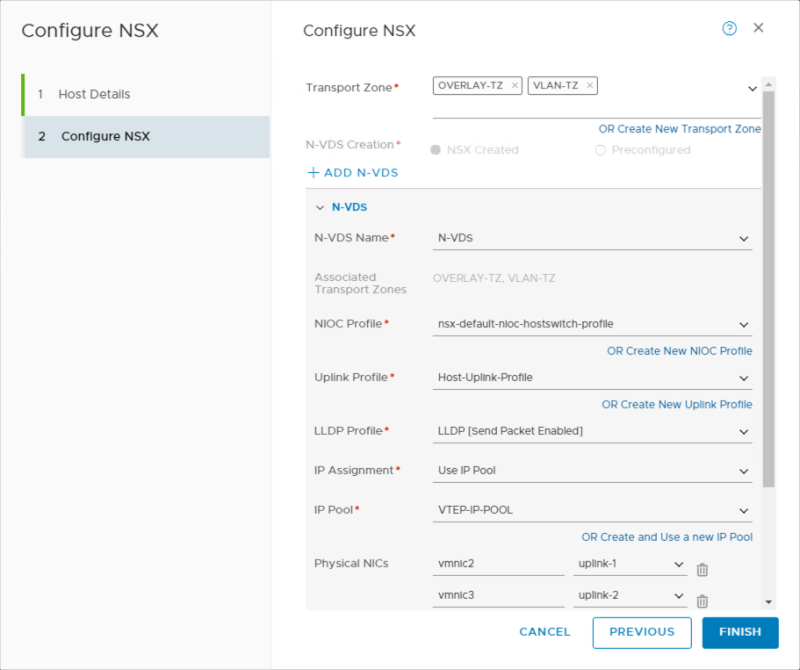
Enter the N-VDS details. You can configure multiple N-VDS switches on a single host. The N-VDS details are as followed:
- Transport Zone: The transport zone that this transport node will belong to
- N-VDS Name: This needs to be the same as N-VDS name of the transport zone that this node belongs to
- NIOC Profile: For ESXi host, select a NIOC profile
- Uplink Profile: Select an existing uplink profile
- LLDP Profile: By default, NSX-T receives LLDP packets but doesn’t send them. You can set LLDP to send in order to send and receive LLDP packets from other LLDP neighbors
- IP Assignment: Select Use DHCP, Use IP Pool or Use Static IP List
- IP Pool: If you select Use IP Pool for IP Assignment, you must select a IP Pool name
- Physical NICs: Add physical NICs to the transport node. You can add additional NICs by clicking Add PNIC.
- PNIC only Migration: Enable only if you want to migrate physical NICs from a VSS or VDS to a N-VDS
- Network Mapping for Install: Used to migrate VMkernels to N-VDS during installation.
- Network Mapping for Uninstall: Used to revert VMkernels to VSS or VDS during uninstallation.
Click Finish.
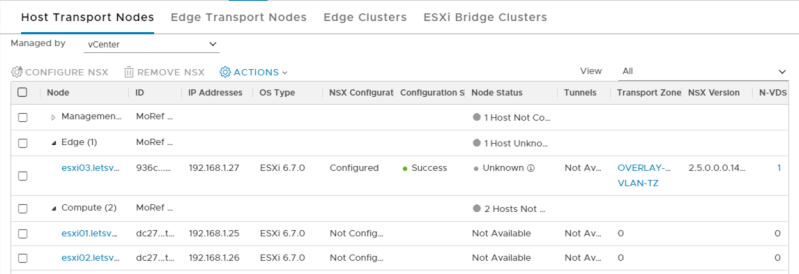
The configuration will begin. Once the Configuration State shows Success, the transport node is ready. You can also click on the transport node to see more details about it.
That’s it. Now you have a transport node that is ready to participate in NSX-T network and security functions.
