
In this blog post, I am going to go through the steps that it takes in order to deploy the NSX Manager for NSX-T Data Center. To start things off, let’s get an overview of the NSX Manager.
What is the NSX Manager?
The NSX Manager is a standalone appliance that hosts the API services, the management plane, control plane, and policy management. As a result of this combined format, you no longer need to install the manager and controllers as separate VMs. The NSX Manager has three built in roles: policy, manager, and controller. The management plane includes the policy and manager roles. The central control plane includes the controller role. The NSX Manager also provides a GUI that is used for creating, configuring, and monitoring NSX components such logical switches, logical routers, and firewalls.
Deployment
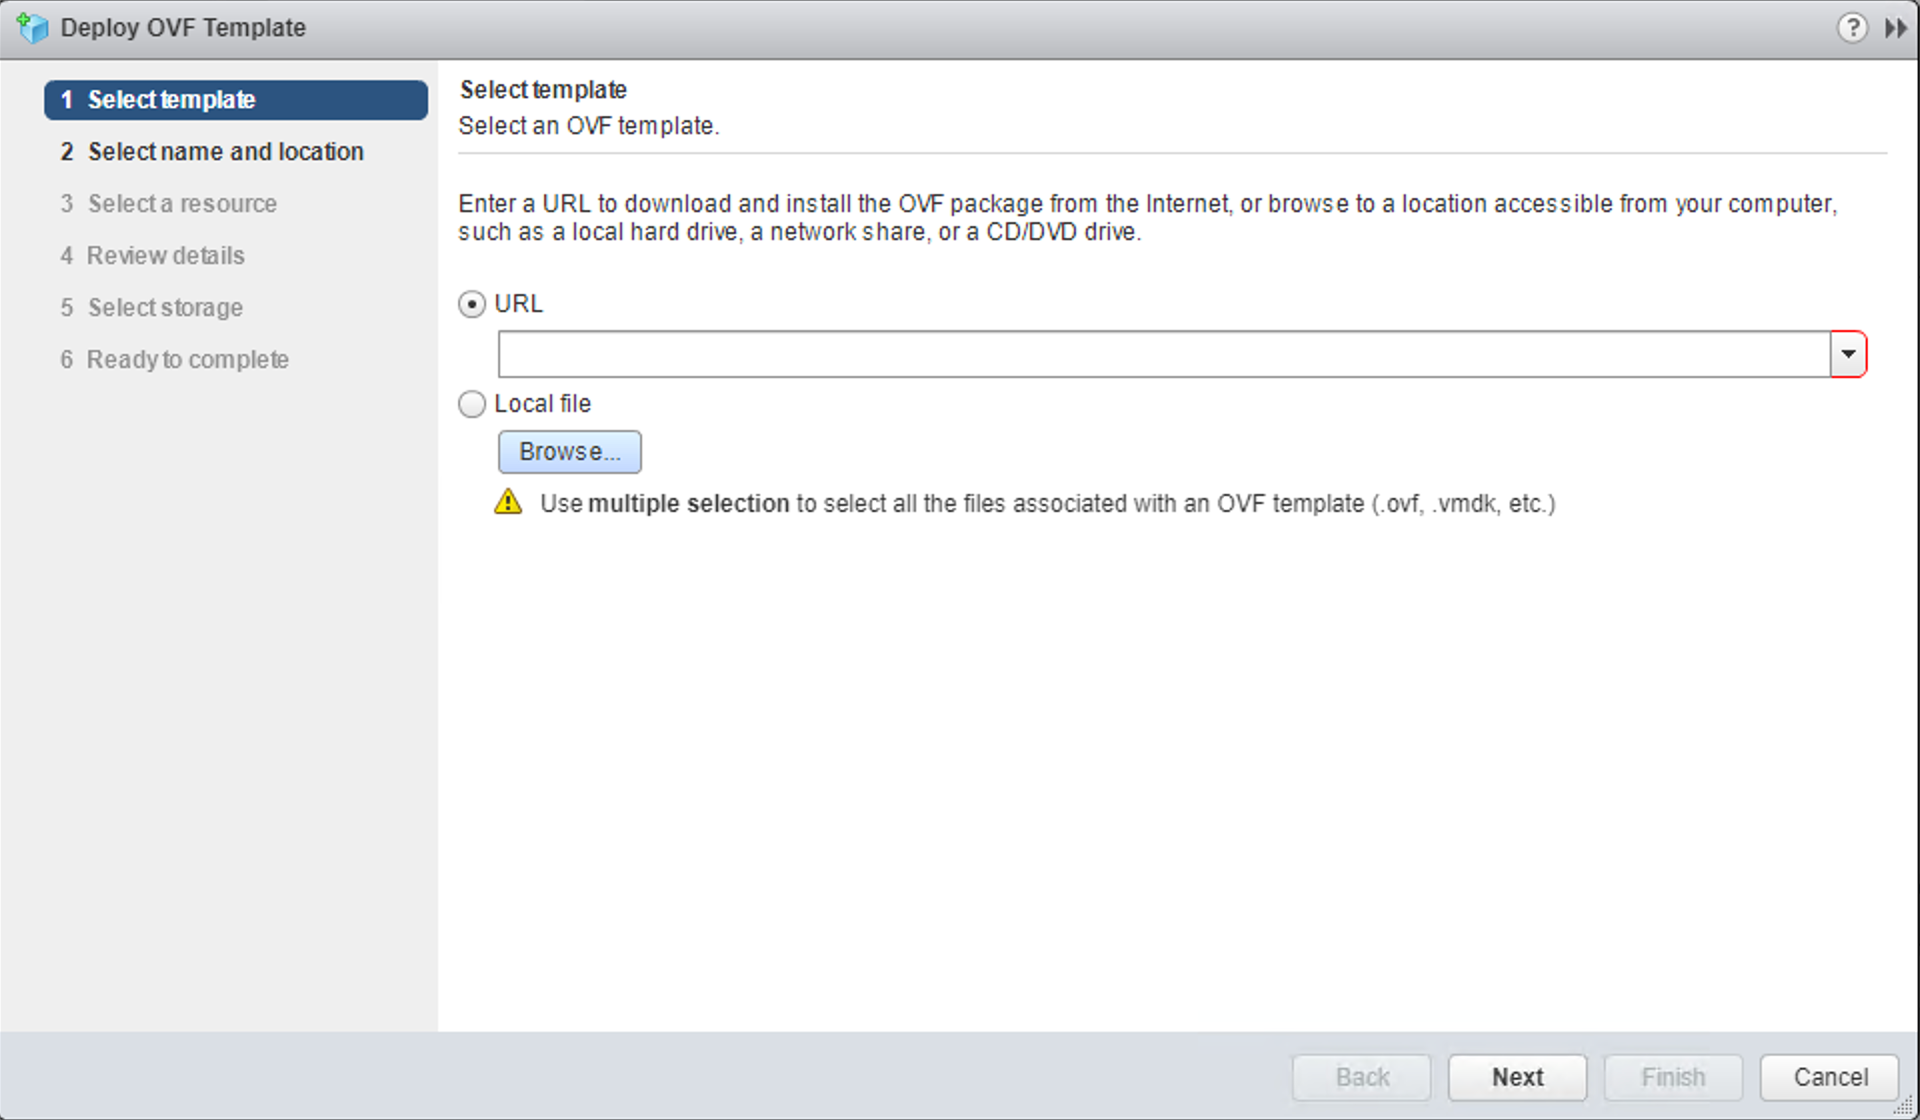
To begin our deployment, log in to your vCenter. Find the cluster/host that you want to deploy the NSX Manager on and right click it and select Deploy OVF Template.

Browse to your NSX Manager OVA file. Select it and click Next.
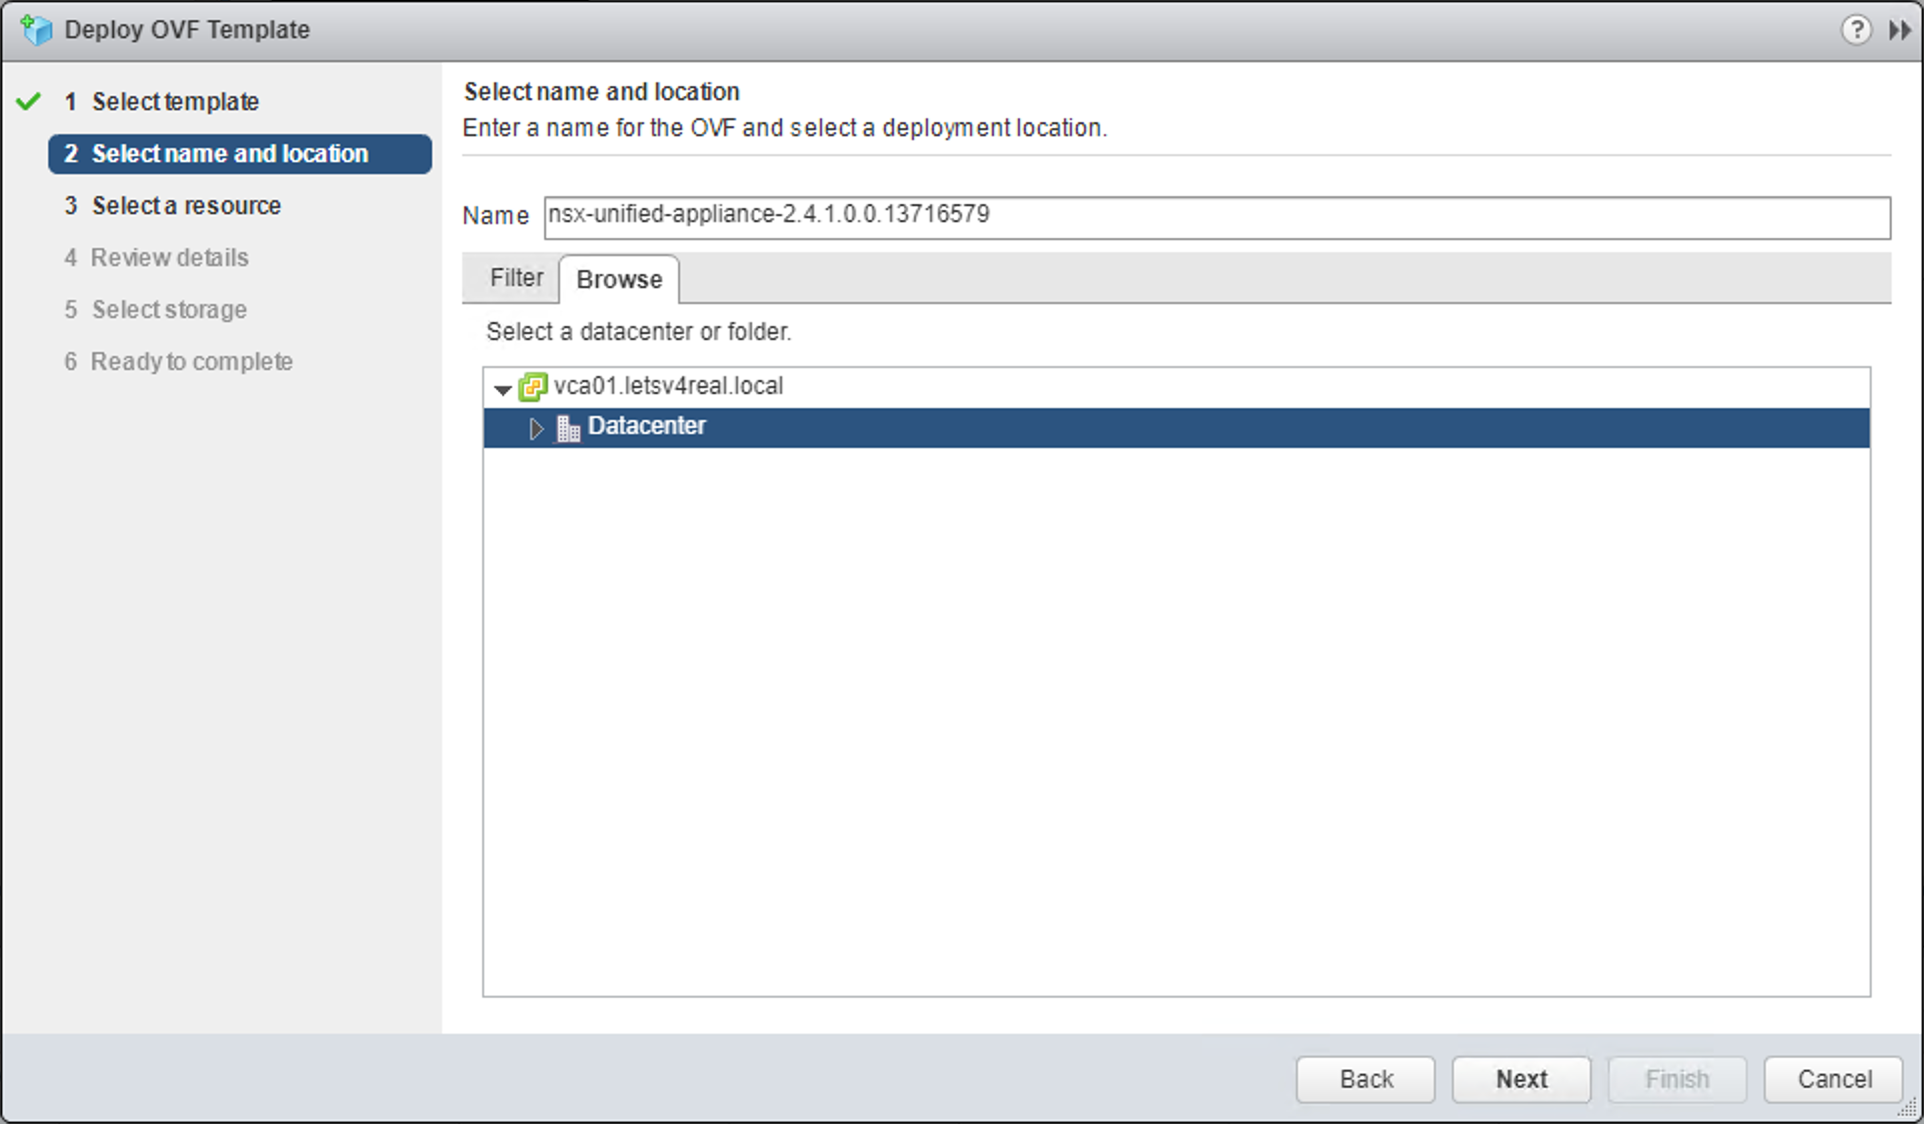
Give the NSX Manager VM a name and select the location where it will reside. Click Next.
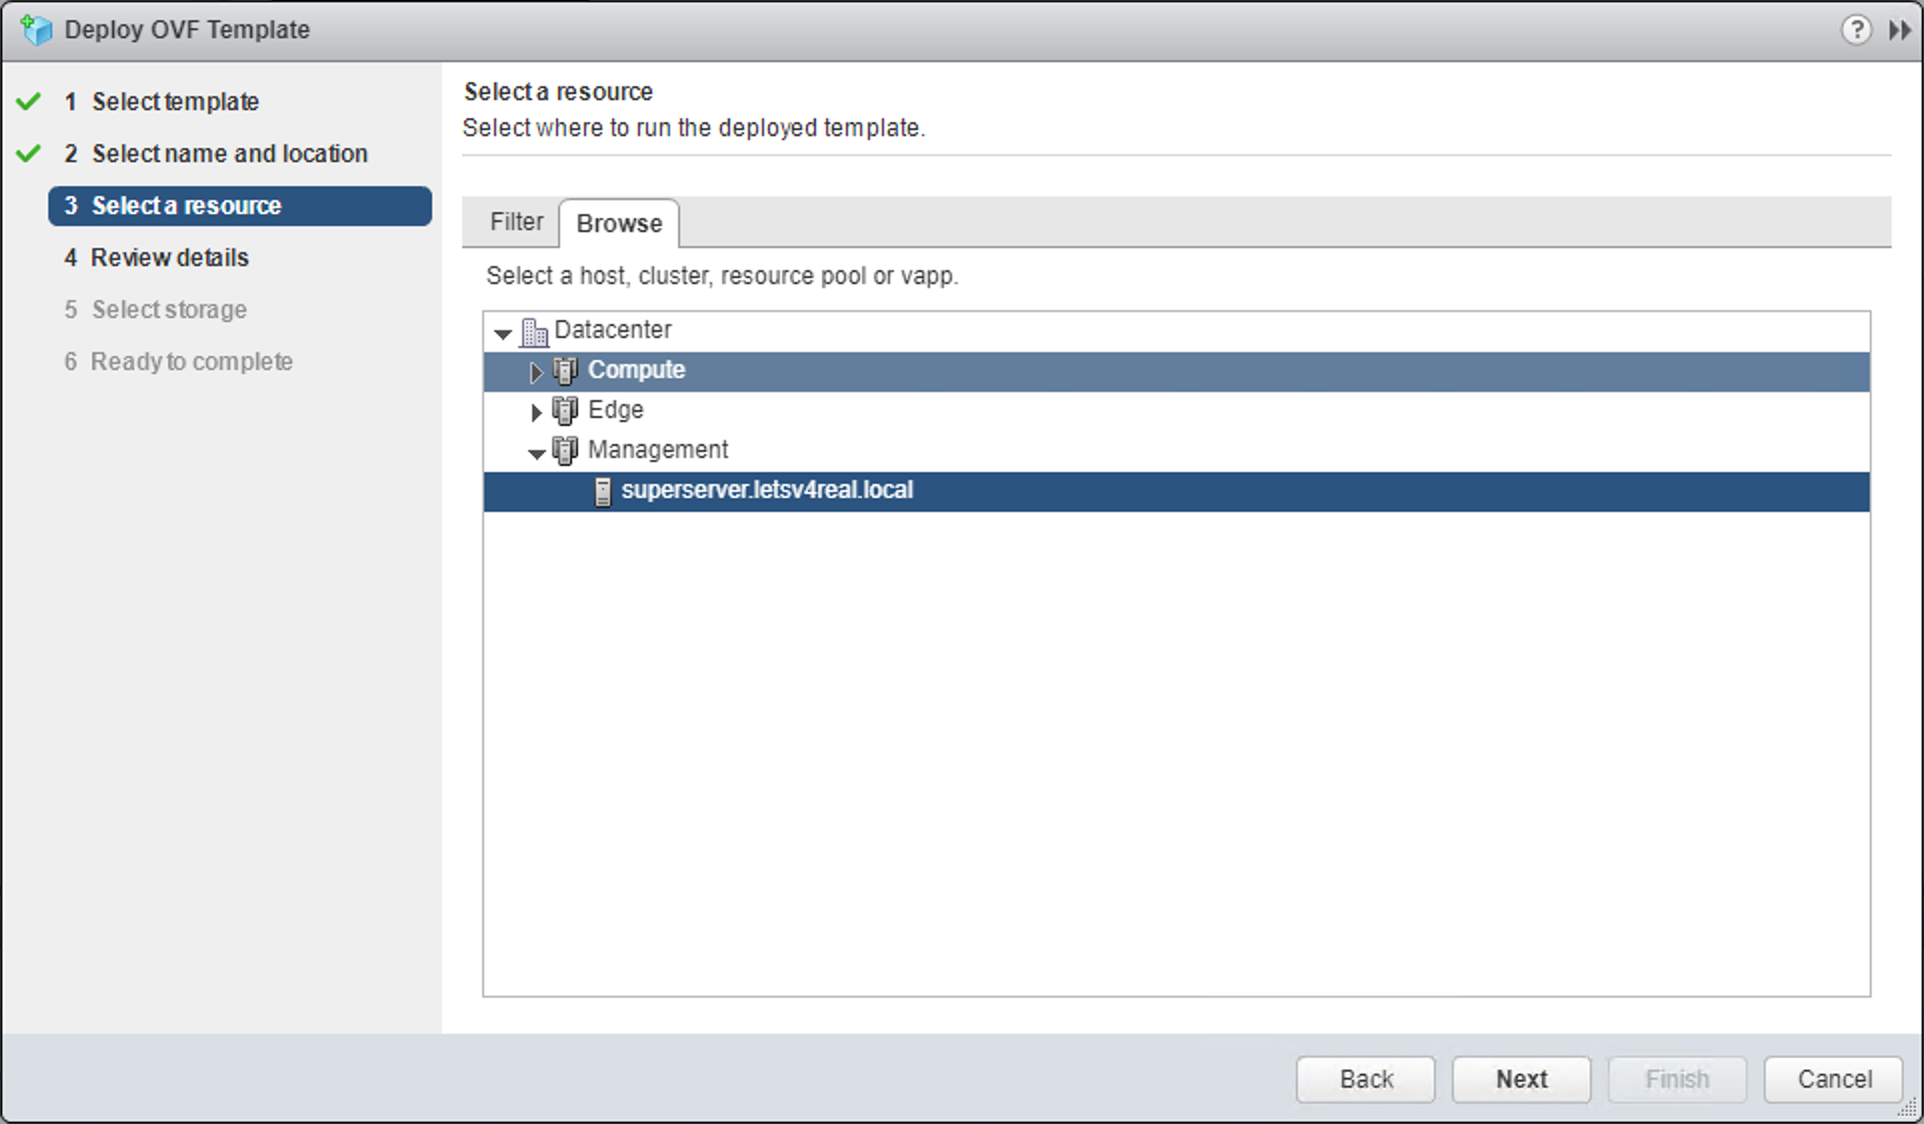
Select the resource that will run the VM. Click Next.
Review the details and then click Next to go on to the configuration.

Select the size of NSX Manager that you want to deploy. For this lab, I selected Small. Click Next.

Select the storage. Click Next.

Select the network that the NSX Manager will connect to. Click Next.

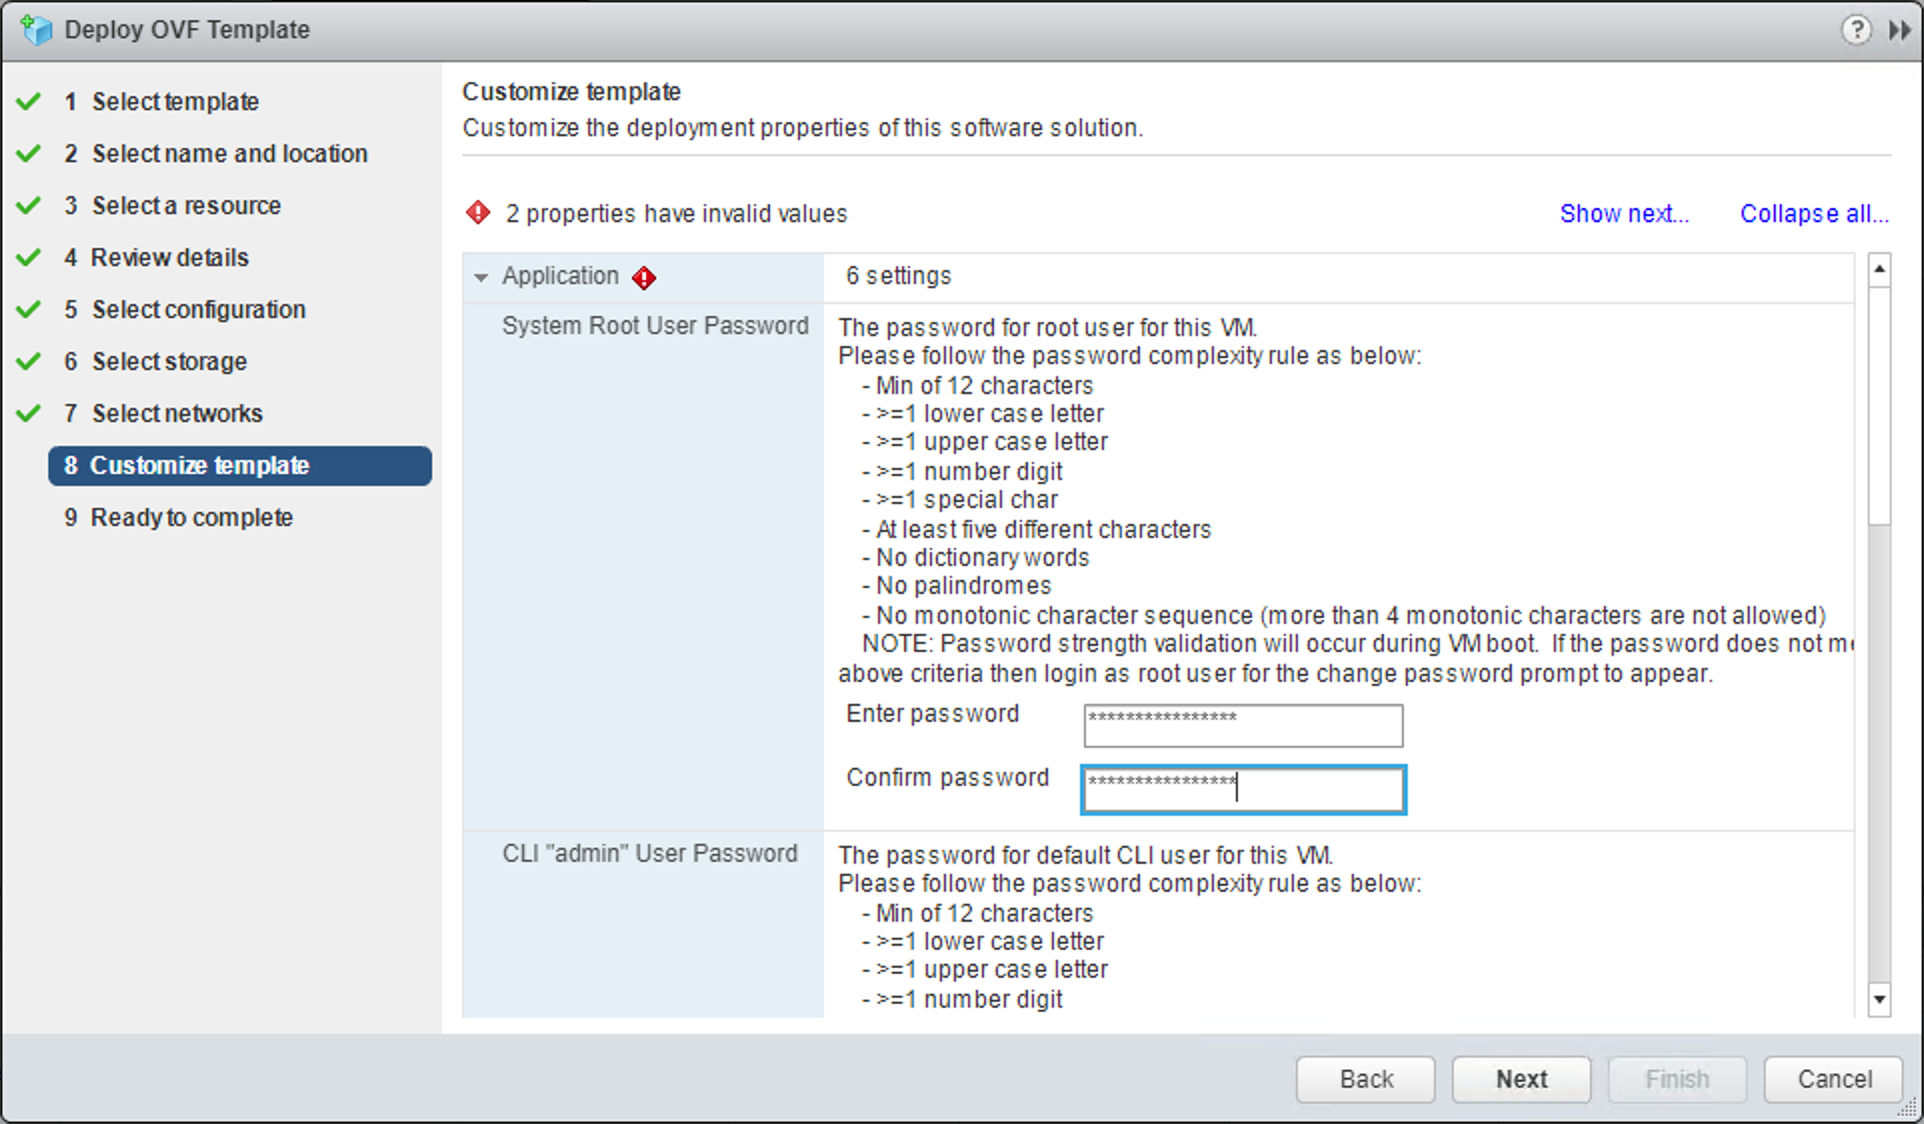
You will need to fill in the NSX Manager customization page. Once complete, click Next.
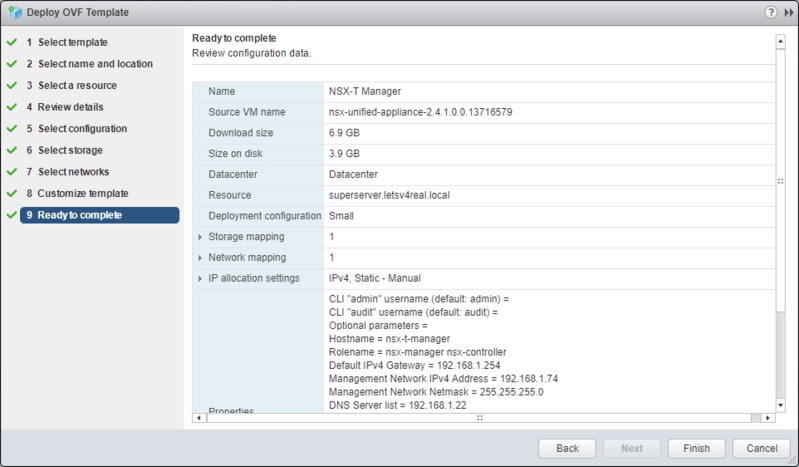
Review your final configuration. Click Next.
Once the NSX Manager has been deployed, you will have to power it on manually. Once the NSX Manager is up and services have started, log in to the manager as the admin user.
Accept the EULA.

Make your selection on the CEIP pop up and click Save.

Now we arrive at the Welcome Screen. For now, just click anywhere on the screen to proceed.

Now we want to just check the status of our management cluster. Navigate to System > Overview
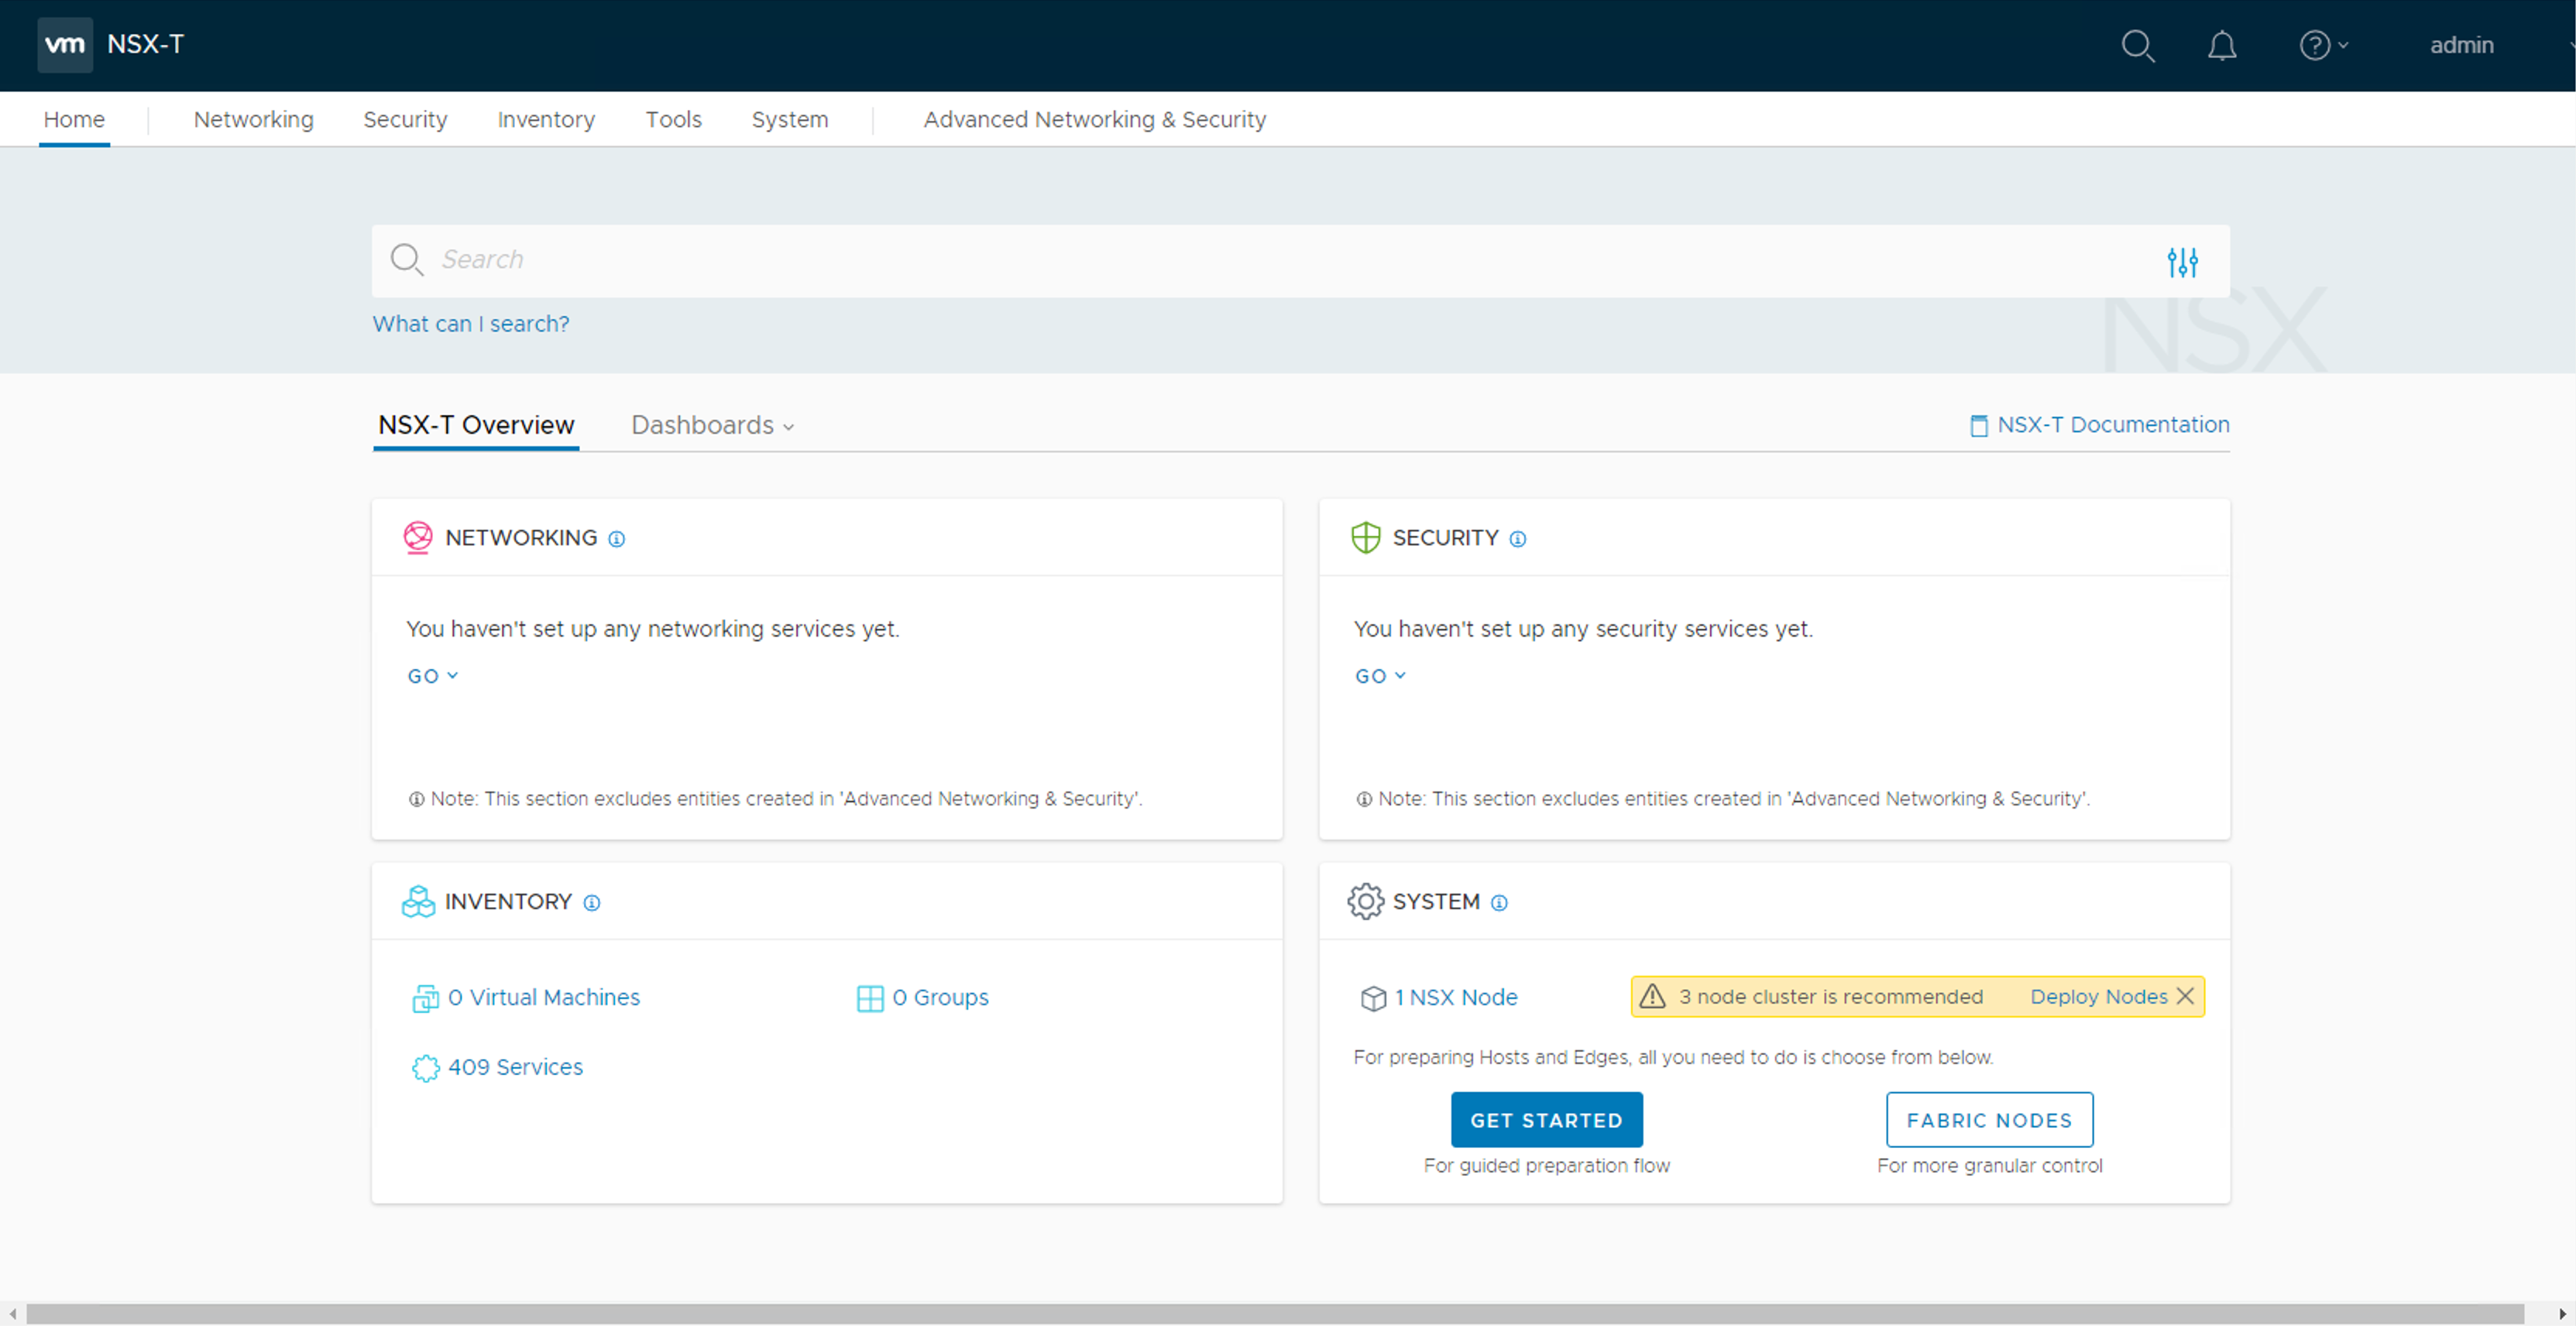
We see the current status of the management cluster. For now we just have one manager and all is good

Attaching a Compute Manager
Adding a compute manager to NSX-T is optional, but if you are going to be using NSX-T in conjunction with a VMware environment then connecting your vCenter to the NSX Manager will prove useful. NSX-T polls the compute manage in order to know about changes to the resources in the environment and updates them accordingly.
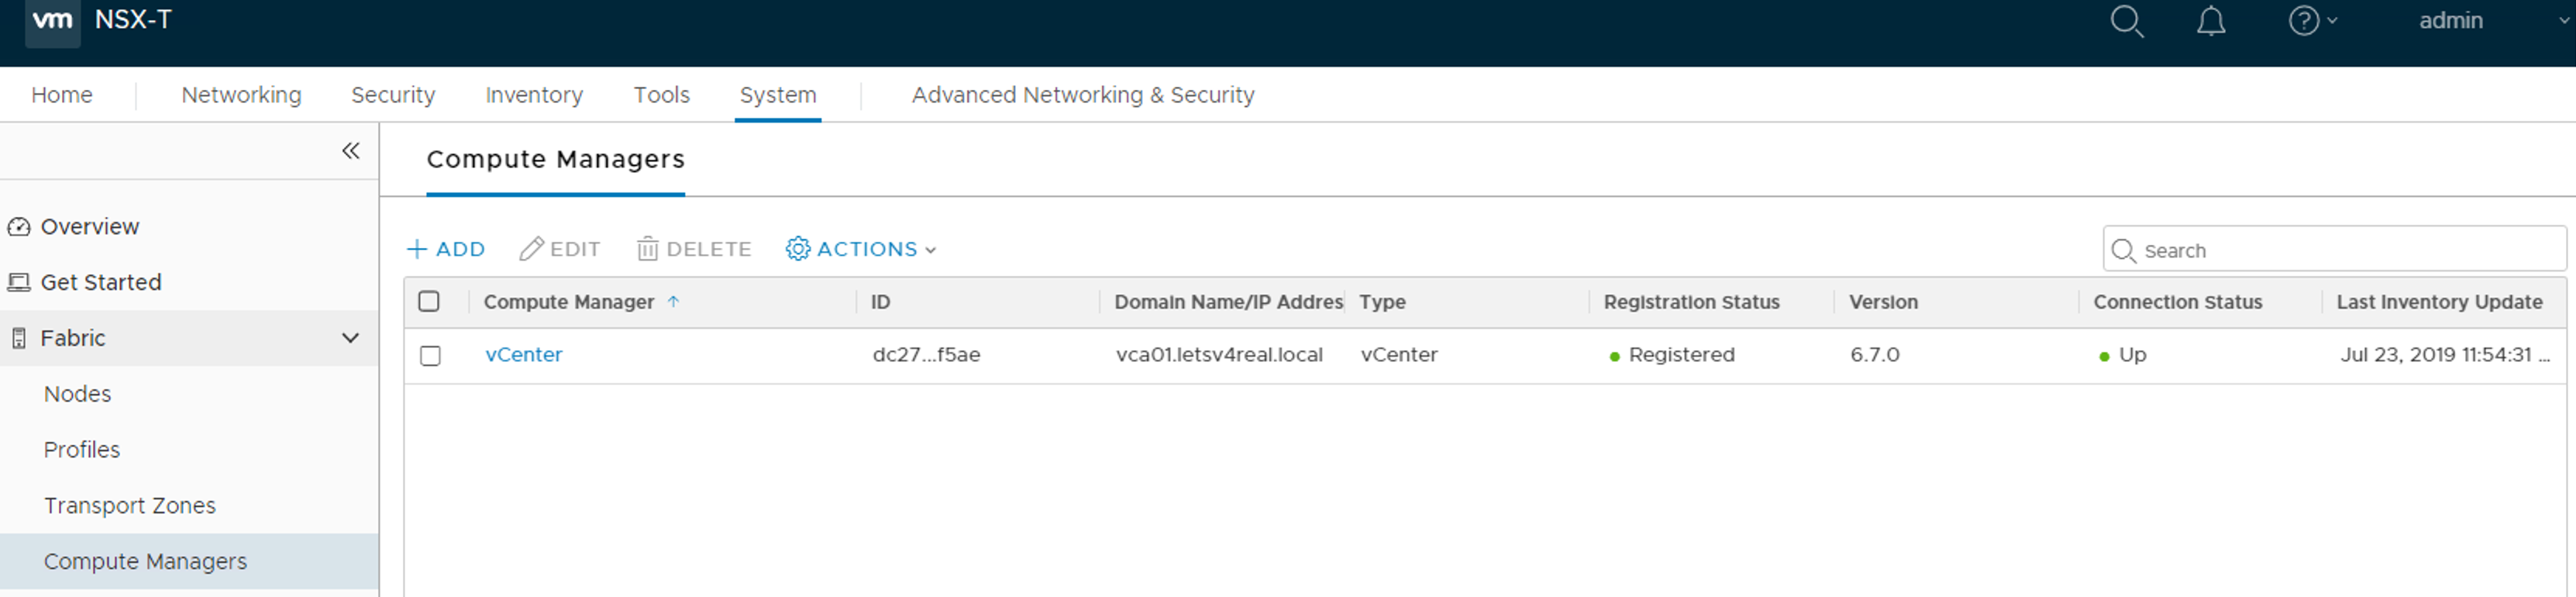
To connect a vCenter to NSX Manager, navigate to System > Fabric > Compute Managers. Click Add.

Enter in a name for the compute manager, domain name or IP address of the vCenter, select the type as vCenter, and enter in administrator level credentials for the vCenter. Click Add.

Click Add at accept the SHA-256 Thumbprint.

Now you will see the vCenter compute manager listed.
As you can see, deploying the NSX-T manager is a pretty straight forward task and is the beginning step to being able to consume other NSX services.
