

Using NSX Edge, you can create a L2 VPN that can stretch multiple logical networks, whether VLAN or VXLAN, across geographical sites. With L2 VPN, a VM can remain on the same subnet when moved between sites and their IP addresses do not have to change. To configure a L2 VPN, you configure a L2 VPN server (destination Edge) and an L2 VPN client (source Edge). Then you enable L2 VPN services on both. But before we can create the L2 VPN, we must create a trunk port on our NSX edge.
First we need to create a portgroup on the vDS for the NSX edge to connect it’s trunk port to:
Navigate to your vDS and create your portgroup

On the teaming and failover configs for the portgroup, make sure only one uplink it set to active and the others are set to standby. This is done to prevent routing loops.
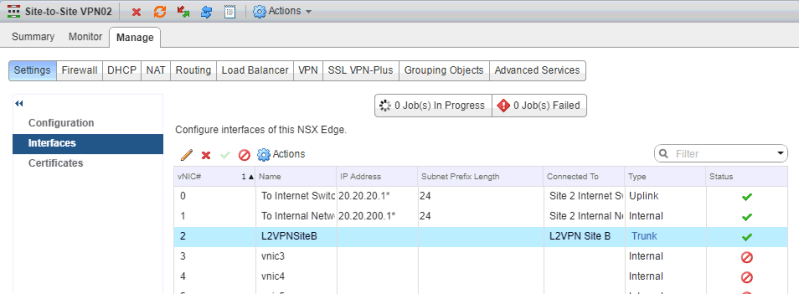
Now navigate back to the NSX edge that you will create the VPN on. Go to Manage > Settings > Interfaces and create a new interface. Make sure you select the Type as Trunk and connect it to the portgroup that was just created

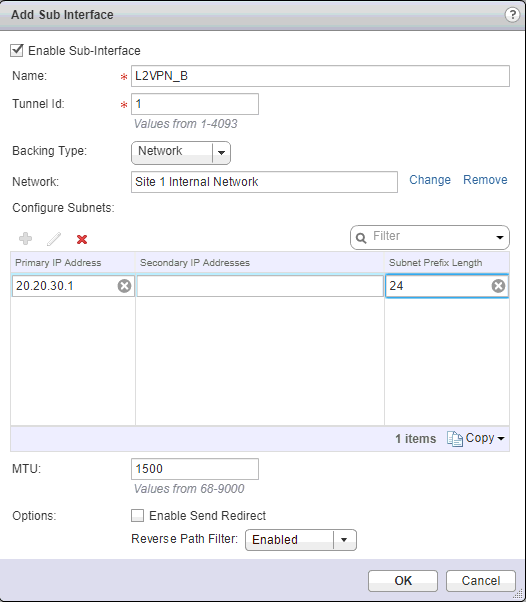
Now click the green + under Sub Interfaces. Enter a name and Tunnel ID. The Tunnel ID will need to be the same for both sites. For Backing Type, Network is for VLAN or VXLAN and VLAN is only for VLAN. I selected Network since I’m going from VXLAN to VXLAN. Select the backend network that you want to allow across the VPN. Enter a primary IP address for the sub interface. Click OK.
Now we see the Trunk interface is created.
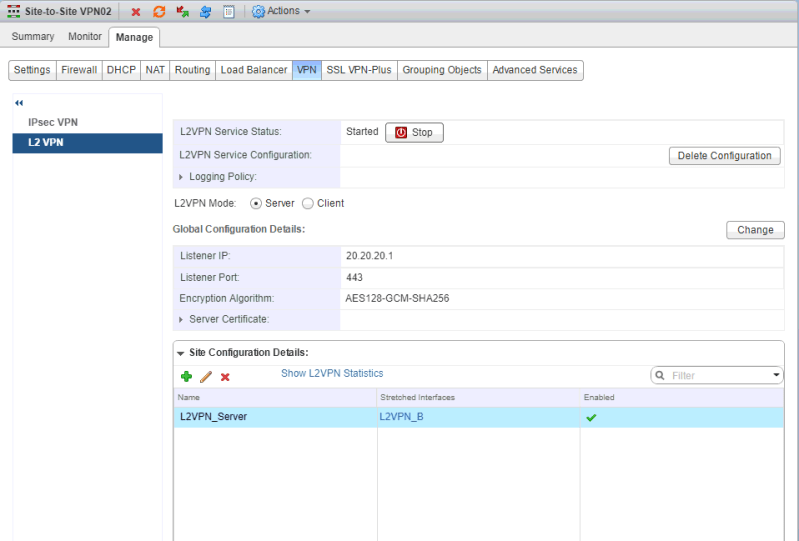
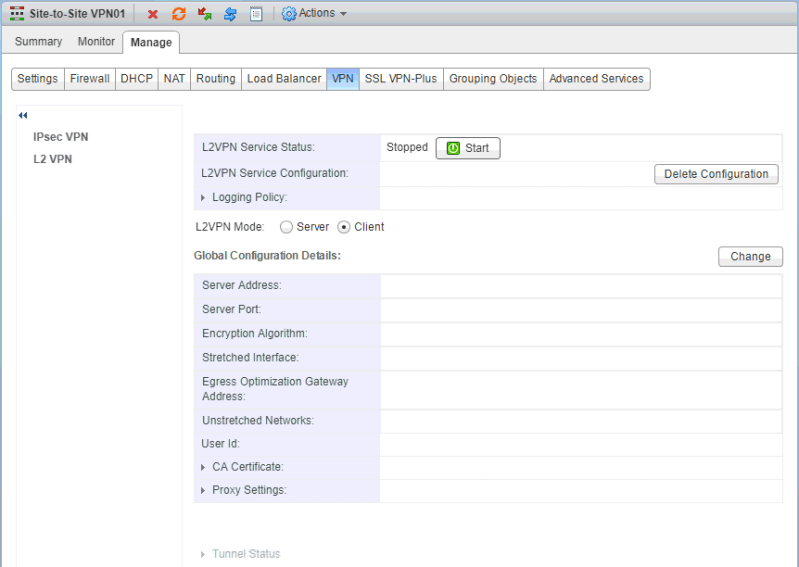
Now under Manage > VPN > L2 VPN, make sure the L2VPN mode is set to Server. Click Change.

Select the external interface, port number, and encryption method. Under certificate details, you can use a system generated, self signed, or cert that you added. Once you have everything selected, click OK.

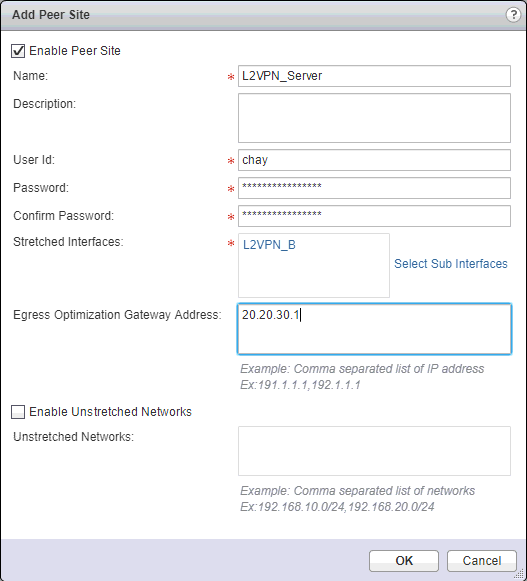
Under Site Configuration Details, click the green +. Enter in a name, user ID and password, and select the sub interface. For Egress Optimization Gateway Address, if the default gateway for virtual machines is the same across the two sites, type the gateway IP addresses of the sub interfaces or the IP addresses to which traffic should not flow over the tunnel. In my case, I entered the IP of the sub interface. Click OK.
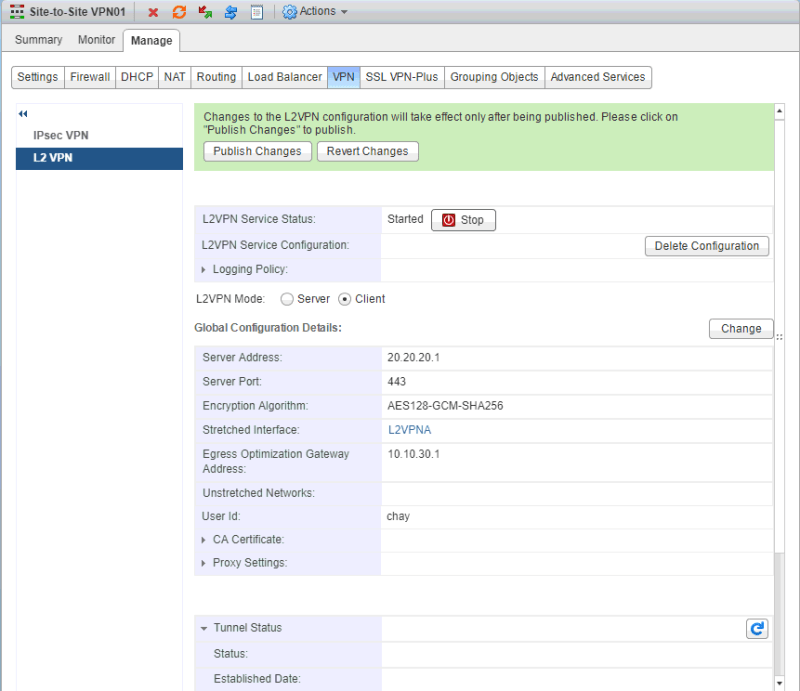
Now go and start the L2VPN Service and Publish Changes on the edge.
Now at our other site, on the edge device doing the L2 VPN, I also create a subinterface

Under Manage > VPN > L2 VPN, make sure the L2VPN mode is set to Client. Click Change.
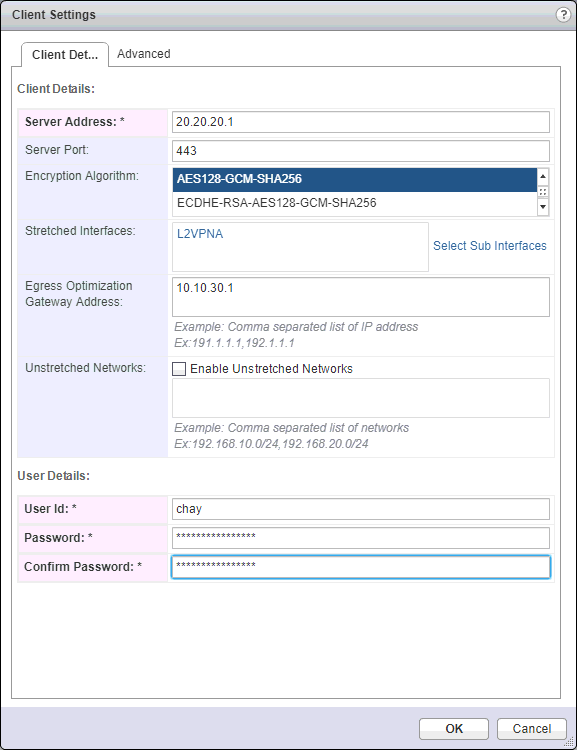
Now we need to configure the client settings. For Server Address, enter in the IP address of the remote VPN server that was just configured. Make sure you select the same encryption algorithm here that you configured on the other site. In Stretched Interface, select the sub interface to be stretched to the server. For Egress Optimization Gateway Address, put in the IP address of the sub interface or the IP address of traffic that should not flow over the tunnel. In the User Details section, enter in the creds that you created on the server side configuration. Click OK.
Now start the L2 VPN service and publish changes
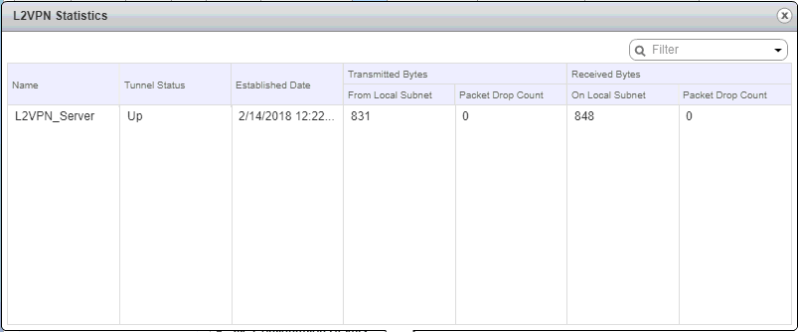
Now, when I go back on the L2 VPN server side and check the L2VPN Statistics, the tunnel status is UP
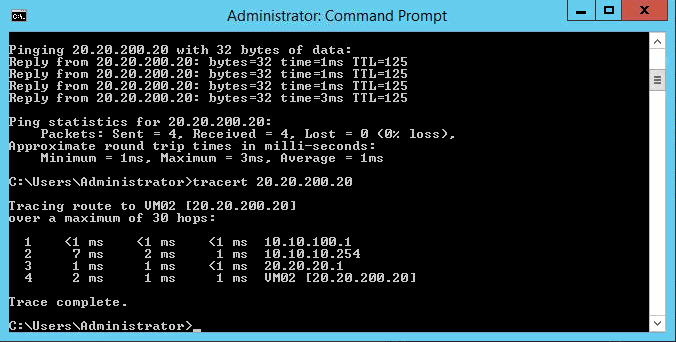
To test my connection between the two sites, I jump on to a VM on Site A (VM01) and run a ping and tracert to a VM on Site B (VM02) and both are successful.
And that’s all there is to it! That wasn’t so bad.
