

In this blog post, I will cover section 1 objective 1.2 of the VCAP6-NV Deploy exam.
Objective 1.2 – Prepare Host Clusters for Network Virtualization
- Prepare vSphere Distributed Switching for NSX
- Prepare a cluster for NSX
- Add/Remove Hosts from cluster
- Configure the appropriate teaming policy for a given implementation
- Configure VXLAN Transport parameters according to a deployment plan
Prepare vSphere Distributed Switching for NSX
The NSX vSwitch is based on the vSphere distributed switch, which provides uplinks for the ESXi host connectivity to physical switches. Although you may connect a host to mulitple VDSs, for simplicity, I create a VDS for each of my clusters. In my lab, I have two VDSs. One is for my management cluster and the other is for my edge and compute clusters.

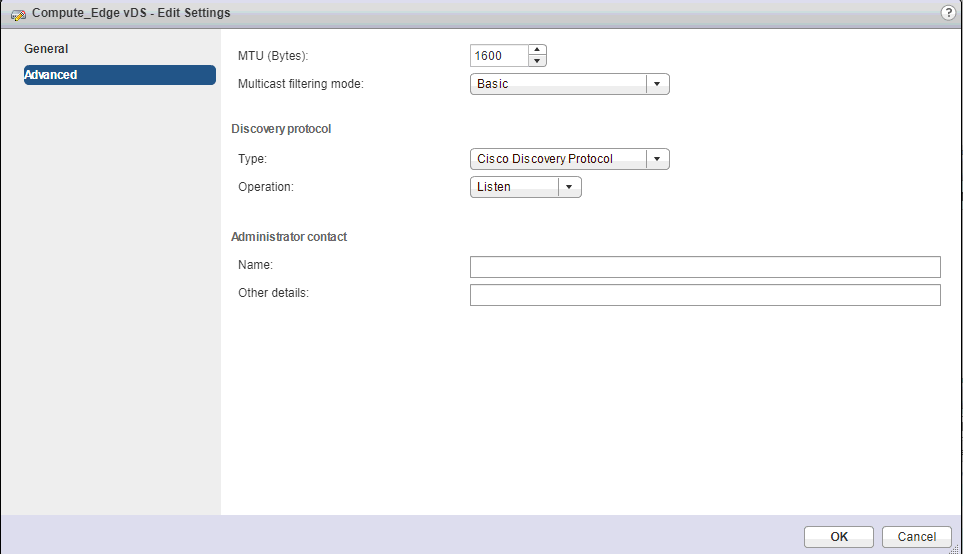
The main thing that you want to make sure of when it comes to a NSX vSwitch is that you change the MTU size to 1600. The reason behind this is the added header size that the VXLAN encapsulation adds to a packet. To change the MTU on your VDS, right click the VDS and click Edit Settings. Under Advanced, you will see the MTU size. Change that to at least 1600.
Prepare a cluster for NSX
During host preparation, the NSX Manager pushes down the NSX kernel modules to the ESXi hosts. The NSX kernel modules provide services like distributed firewall and routing and VXLAN bridging. You must install NSX components on a per-cluster basis. When a new host is added to the cluster, the VIBs are automatically installed on that host. There are some things you want to have in order before preparing a cluster for NSX:
- Register vCenter with NSX Manager and deploy controllers
- DNS forward and reverse lookup for the NSX Manager in place
- Check that hosts can resolve DNS of vCenter server
- Check that the network time of the vCenter and the hosts are in sync
- Check that hosts are attached to a common vDS
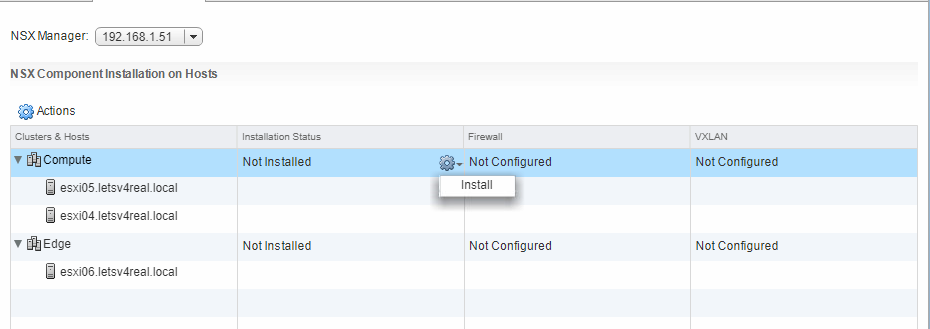
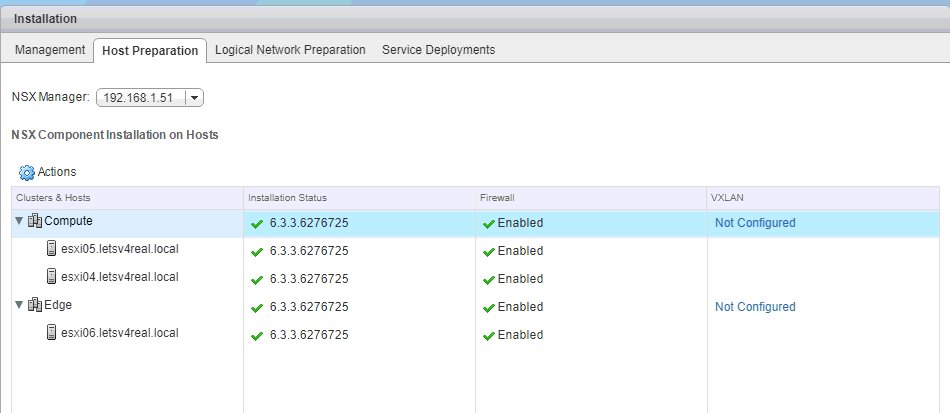
To being, navigate to Networking & Security > Installation > Host Preparation

Click the Actions icon and click Install
Click Yes
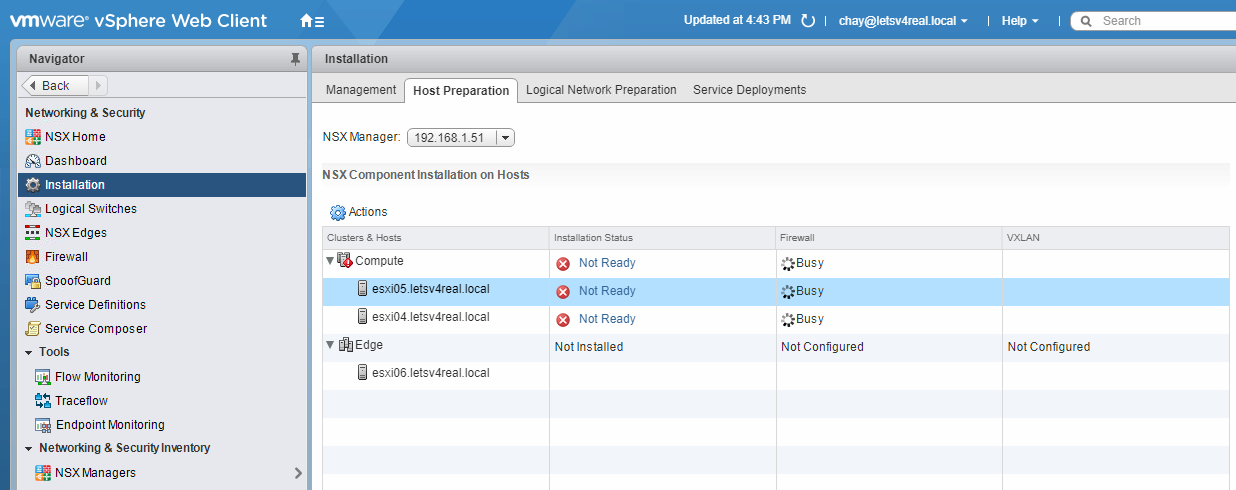
If your Installation Status shows Not Ready, you may need to reboot your hosts in order for everything to finish setting up. In my case, I’ve already rebooted and now I’m just waiting for it to finish. Do this for all clusters that you want prepared for NSX.
After some time, everything should look like this:
Add/Remove Hosts from Cluster
To Add a host:
- Place host in maintenance mode
- Join host to vDS that is a part of the cluster
- Move host into cluster
- NSX VIBs will automatically be installed
- Take host out maintenance mode
To Remove a host:
- Place host in maintenance mode
- Move host out of cluster
- NSX VIBs will automatically be removed
- Reboot host
- Take out of maintenance mode
Configure the appropriate teaming policy for a given implementation
I don’t think I could explain this any better than pg. 113-117 of the NSX Reference Design Guide so I won’t try to reinvent the wheel here.
Here are a list of prerequisites to follow:
- All hosts within a cluster should share a common vDS
- NSX Manager must be installed
- NSX controllers must be installed, unless using multicast replication
- Do not mix teaming policies for different portgroups on a vSphere Distributed Switch. If uplinks are shared in these different teaming policies, then traffic will be interrupted. If logical routers are present, there will be routing problems. As a best practice – if you want to use IP hash based teaming (Ether channel, LACPv1, or LACPv2), use all uplinks on the vSphere Distributed Switch for the team and do not have portgroups on that vSphere Distributed Switch with different teaming policies.
- Make sure the VLAN ID for the VTEPs are the same
Configure VXLAN Transport parameters according to a deployment plan
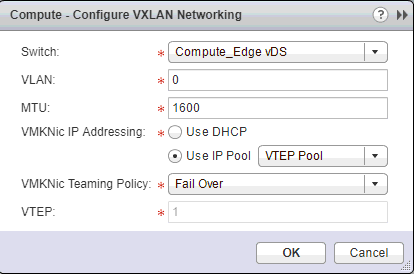
Navigate to Networking & Security > Installation > Host Preparation. Click Not Configured under VXLAN.
This is where we will decide the VTEP teaming method and IP addresses that the VTEPs will use. For my lab, I’m going to use Fail Over for the teaming method.

I also created a IP pool for the VMKNic IP Addressing
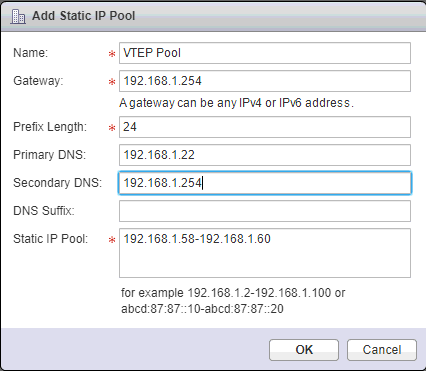
Select the newly created IP Pool and click OK.
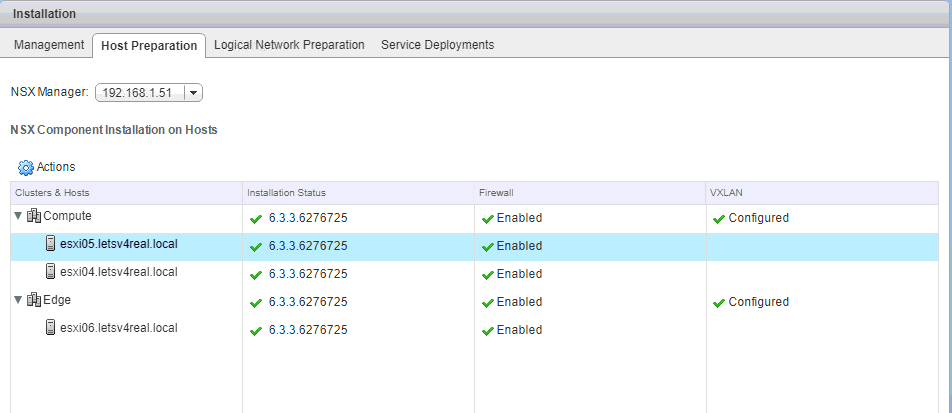
The VXLAN status should Configured after a short time
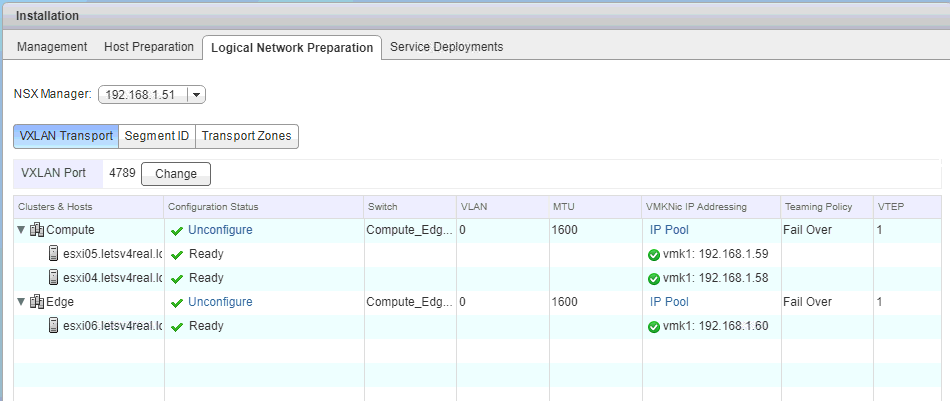
Now if we navigate over to Networking & Security > Installation > Logical Network Preparation > VXLAN Transport, we should see the VTEP addresses assigned to each host
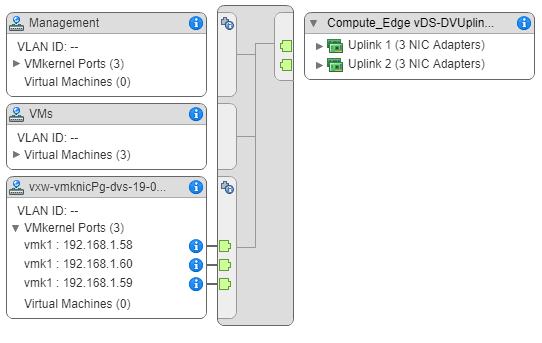
Also if we go look at our vDS, we will see that another VMkernel portgroup was created. This what the VTEPs connect to.
Assign a Segment ID Pool and Multicast Range
Navigate back over to Networking & Security > Installation > Logical Network Preparation > Segment ID. This is where we will create the VXLAN Network Identifiers (VNI). These are the numbers that are assigned to logical switches as they are deployed. You must specify a segment ID pool for each NSX manager to isolate your traffic.
The range starts at 5000 and ends at 16777216. Make sure your segment IDs do not overlap any other NSX install that you might have. Also, you should not create more than 10,000 VNIs in a singe vCenter because vCenter limits the number of portgroups on a vDS to 10,000.
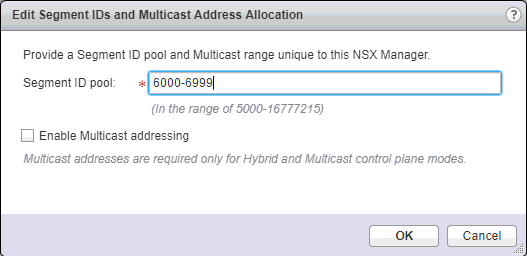
To configure a Segment ID click Edit

Specify your range. Click OK
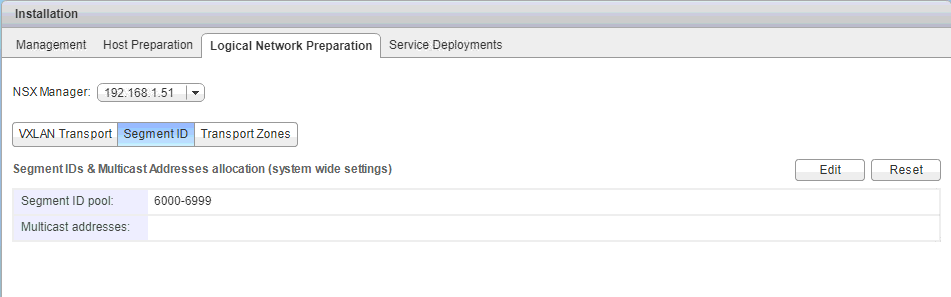
Now you have your segment IDs
Within the GUI you can only create one range of segment IDs but by using NSX API you can create multiple segment ID ranges. If you want to do that here is the command syntax:
POST https://<nsxmgr-ip>/api/2.0/vdn/config/segments
<segmentRange>
<name>Segment ID Pool 1</name>
<begin>6000</begin>
<end>6999</end>
</segmentRange>
POST https://<nsxmgr-ip>/api/2.0/vdn/config/segments
<segmentRange>
<name>Segment ID Pool 2</name>
<begin>7000</begin>
<end>7999</end>
</segmentRange>
